Migrating a database from Microsoft Azure SQL to Amazon Aurora (PostgreSQL)
Somebody who likes to code
Database migration, especially between heterogeneous engines, is always a complex task. Luckily for us, AWS offers a set of services/tools from the schema conversion until the data migration to make our life easier.
AWS Database Migration Service (AWS DMS) is a cloud service that makes it possible to migrate relational databases, data warehouses, NoSQL databases, and other types of data stores. You can use AWS DMS to migrate your data into the AWS Cloud or between combinations of cloud and on-premises setups.
Concepts
Source Endpoint: Source database you wish to migrate.
Target Endpoint: Database to which your data will be migrated.
Replication instance: It's an EC2 instance on which the migration task runs.
Database migration task: Used to move data from a source to a target in a Replication instance.

In this post, we will migrate an Azure SQL Server database to an Amazon Aurora database. Let's start.
Prerequisites
An Azure SQL Server, up and running.
An Amazon Aurora Server (PostgreSQL compatible edition), up and running.
Create a Northwind database (Azure SQL) and run this script.
Create a Northwind database (Amazon Aurora).
Migration Process
Convert the Azure SQL database schema to a PostgreSQL schema
Currently, there are two options for schema conversion:
You can use the AWS Schema Conversion Tool (AWS SCT) to convert your existing database schema from one database engine to another. You can convert relational OLTP schema or data warehouse schema. Your converted schema is suitable for an Amazon Relational Database Service (Amazon RDS) MySQL, MariaDB, Oracle, SQL Server, PostgreSQL DB, an Amazon Aurora DB cluster, or an Amazon Redshift cluster
Follow the instructions here to install the AWS SCT. We will need to download the following database drivers:
Open the AWS SCT, go to the File menu, and select the New Project Wizard:

Click Next and fulfill all the connection data against the source database (the first time the wizard will ask for the driver location path):

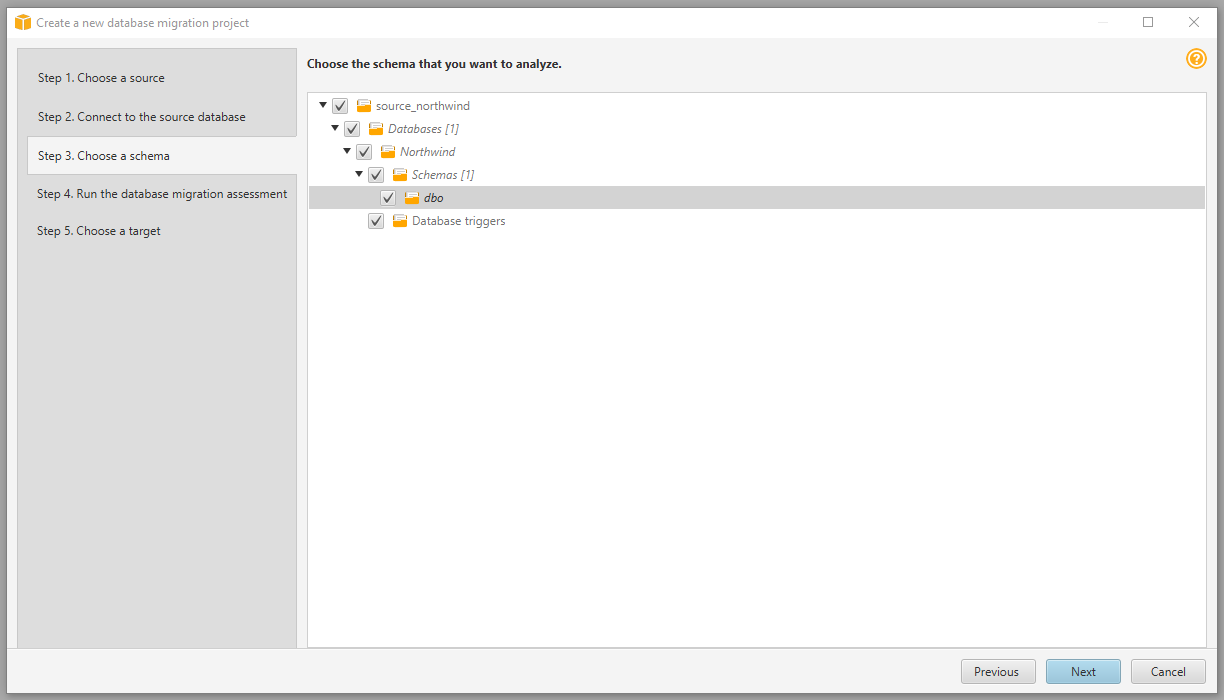
Test the connection (make sure your source database allows connections from your IP address) and, if everything is okay, click Next and choose the schema to migrate:
Click Next to see a migration assessment of your schema to different database engines:

Click Next and fulfill all the connection data against the target database (the first time the wizard will ask for the driver location path):

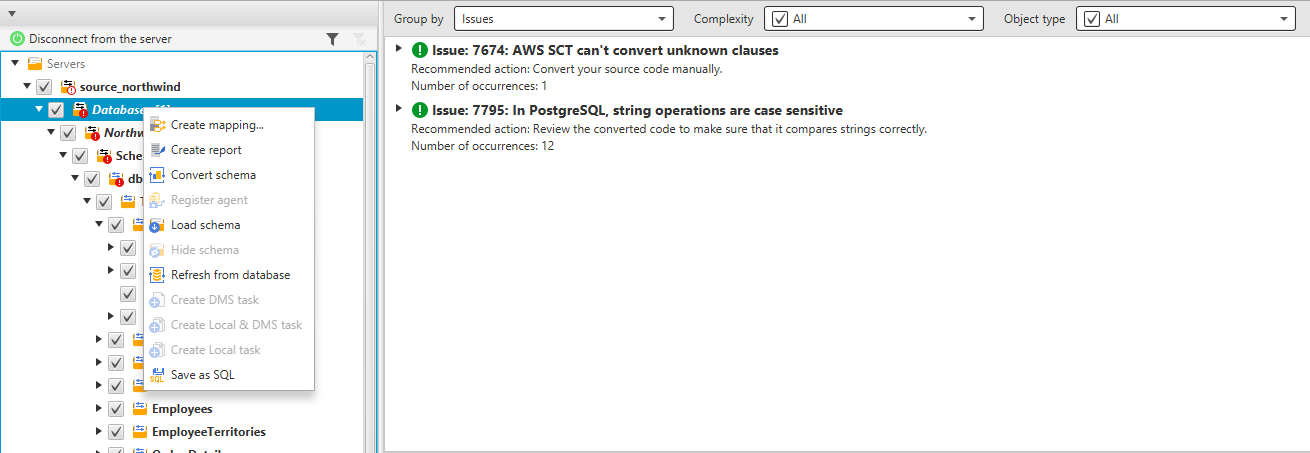
Click Finish to see a summary of the schema migration. Select the Action Items to see the suggested SQL changes. Right-click on the source database and click Convert Schema:
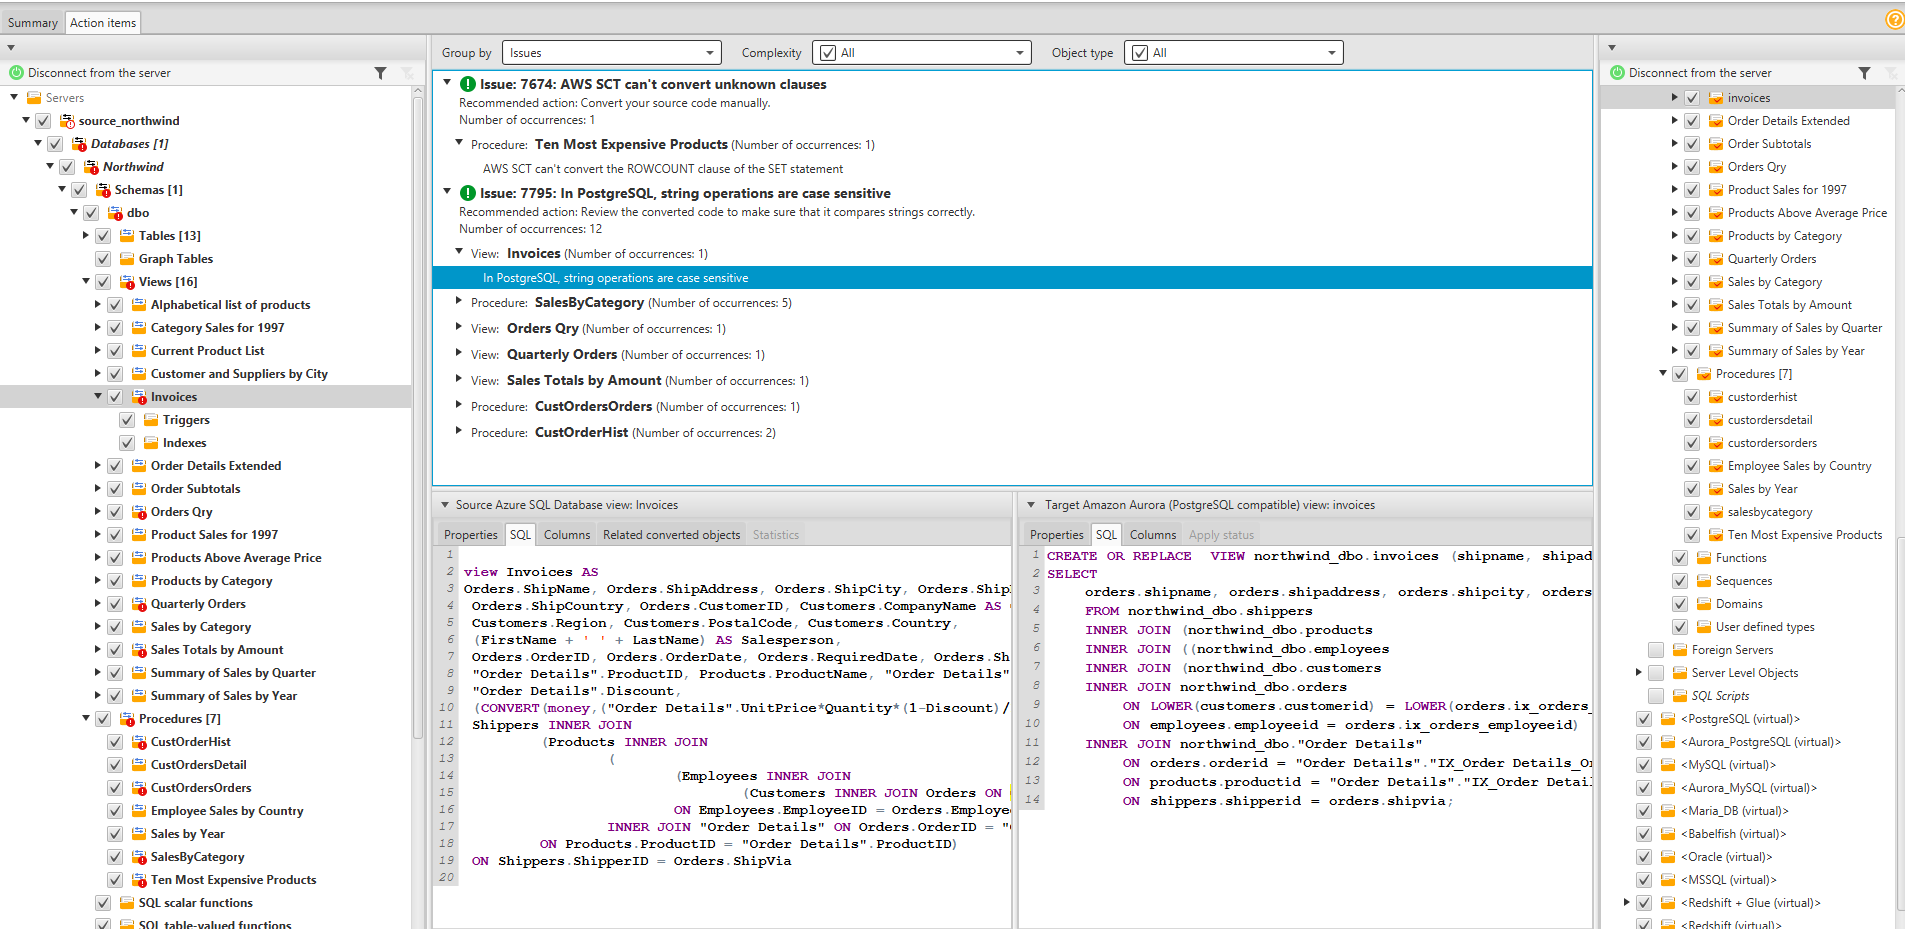
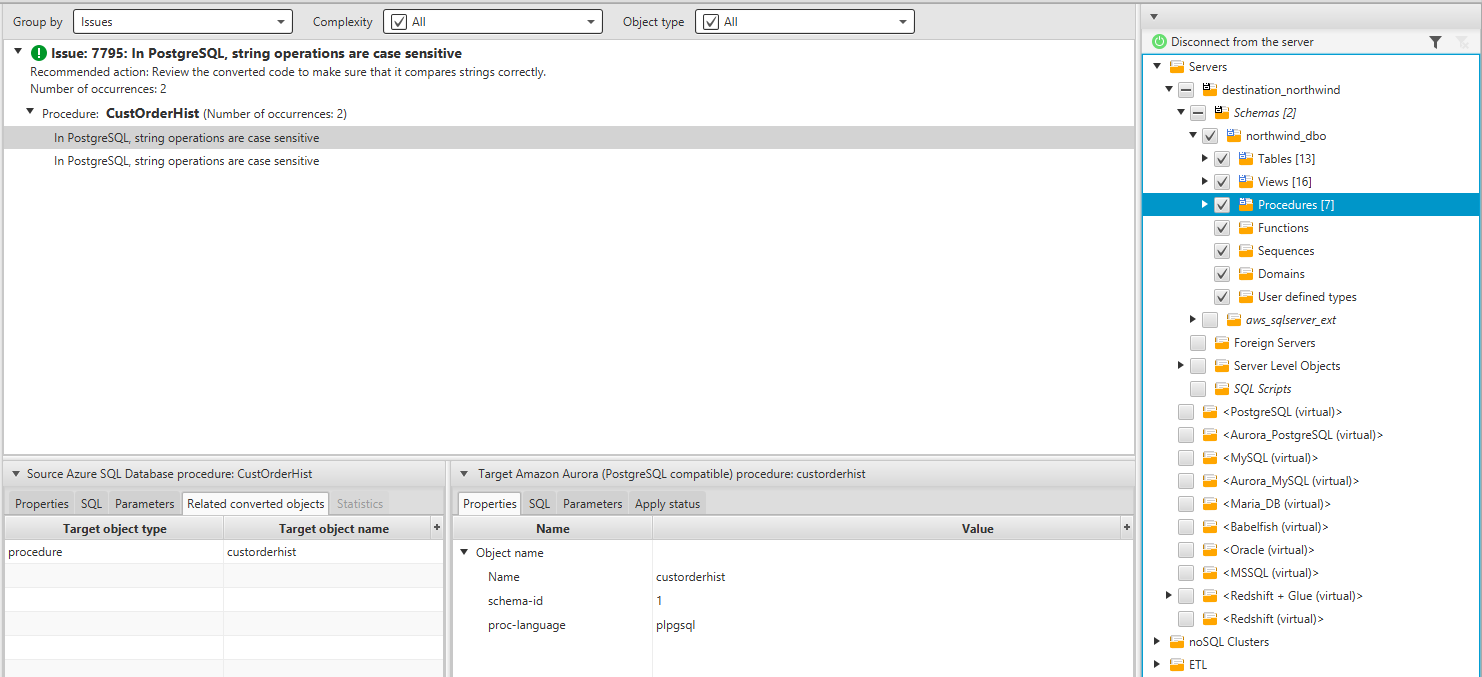
At this point, we can see the generated SQL script for every entity on our source database. We can edit it, especially if you have a blue issue (those require manual intervention to fix it):
Go to the target database, right-click on the target schema and click Apply to database:

And that's it. You have your schema fully migrated into the target database:
Create an AWS DMS replication instance
In the AWS Console, go to the Database Migration Service, click on Replication instances and create a new one:

Define an AWS DMS endpoints
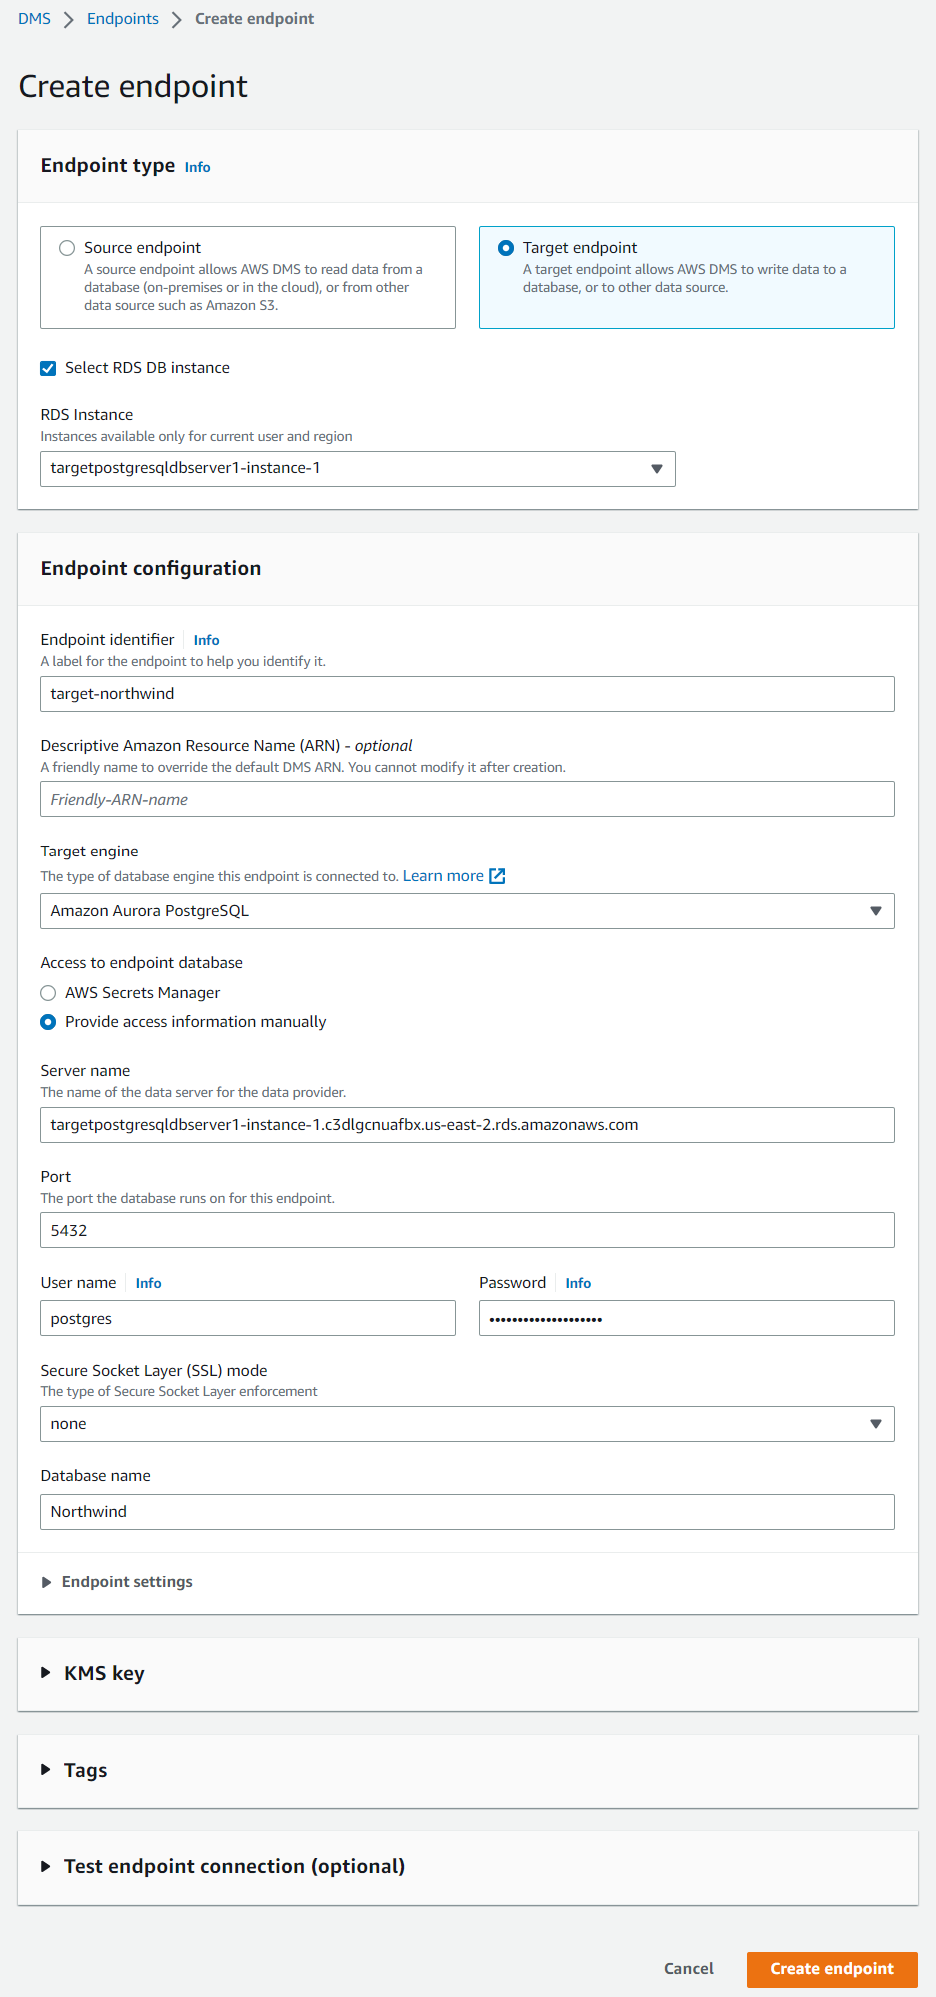
In the AWS Console, go to the Database Migration Service, click on Endpoints and create the source endpoint:

Optionally you can test the connection against your database (use the Replication instance created in the previous step). Make sure your database allows connections from the IP address of the Replication instance. Let's create the target endpoint:
Create an AWS DMS migration task
In the AWS Console, go to the Database Migration Service, click on Database migration tasks and create a new one:

Nothing was chosen as the Target table preparation mode because we will manually truncate all the tables before every run of this task. As AWS DMS does not follow any order during the migration, disabling foreign key constraints is highly recommended. Open our migration task (wait until it completes) and see the result of our migration:

Thanks, and happy coding.


