Authentication with Amazon Cognito and ASP.NET Core Identity
Somebody who likes to code
Amazon Cognito is an identity platform for web and mobile apps. It’s a user directory, an authentication server, and an authorization service for OAuth 2.0 access tokens and AWS credentials. With Amazon Cognito, you can authenticate and authorize users from the built-in user directory, from your enterprise directory, and from consumer identity providers like Google and Facebook.
Amazon Cognito User Pools provides two options for signing up, signing in, and managing users:
Amazon Cognito user pools API. With this option, we can set up pools and authenticate users directly from our application. We are responsible for creating the UI and calling the appropriate services. We can find the API reference here.
User pool federation endpoints and hosted UI. In this scenario, Amazon Cognito offers a customizable, hosted UI that can be easily integrated into our application. Simplifying the authentication process for our users by offering a consistent experience.
ASP.NET Core Identity is an abstraction that adds user authentication and authorization functionality to ASP.NET Core applications. It provides a robust set of features for managing user accounts, including user registration, login, logout, password reset, and account management. Luckily, there is an ASP.NET Core Identity provider for Amazon Cognito that simplifies our work in using the Amazon Cognito user pools API mentioned earlier. In this article, we will outline the steps to use the provider in our applications.
Pre-requisites
Have an IAM User with programmatic access.
Install the AWS CLI.
Install AWS SAM CLI.
User pool
To create the AWS Cognito resources, we will use AWS SAM. Start by creating a template.yml file with the following content:
AWSTemplateFormatVersion: '2010-09-09'
Transform: AWS::Serverless-2016-10-31
Description: >
  SAM Template

Resources:
  UserPool:
    Type: AWS::Cognito::UserPool
    Properties:
      UsernameAttributes:
       - email
      UsernameConfiguration:
        CaseSensitive: false
      Policies:
        PasswordPolicy:
         MinimumLength: 8
         RequireLowercase: false
         RequireNumbers: false
         RequireSymbols: false
         RequireUppercase: false
         TemporaryPasswordValidityDays: 7
      MfaConfiguration: 'OFF'
      AccountRecoverySetting:
        RecoveryMechanisms:
          - Name: verified_email
            Priority: 1
      AdminCreateUserConfig:
        AllowAdminCreateUserOnly: false
      AutoVerifiedAttributes:
        - email
      UserPoolName: "myuserpool"
      UserAttributeUpdateSettings:
        AttributesRequireVerificationBeforeUpdate:
          - email
      Schema:
        - Name: email
          AttributeDataType: String
          Mutable: false
          Required: true
      EmailConfiguration:
        EmailSendingAccount: COGNITO_DEFAULT
Here are the details for the properties used in the AWS::Cognito::UserPool resource:
UsernameAttributes: Specifies which user attributes can be used as the username when users sign up or sign in to the user pool. This property allows us to define the attributes that uniquely identify users within the user pool. The valid values areemailandphone_number.UsernameConfiguration: Specifies case sensitivity on the username input for the selected sign-in option. For most use cases, set case sensitivity toFalse(case insensitive) as a best practice.PasswordPolicy: Allows us to configure the password policy settings for user passwords within the user pool. These settings define the requirements and constraints for passwords used by users when signing up or changing their passwords.MinimumLength: An integer value specifying the minimum length required for user passwords.RequireUppercase: A boolean value indicating whether user passwords must contain at least one uppercase letter.RequireLowercase: A boolean value indicating whether user passwords must contain at least one lowercase letter.RequireNumbers: A boolean value indicating whether user passwords must contain at least one numeric character.RequireSymbols: A boolean value indicating whether user passwords must contain at least one special character or symbol.TemporaryPasswordValidityDays: An integer value specifying the number of days a temporary password is valid before the user is required to change it.
MfaConfiguration: Allows us to configure the Multi-Factor Authentication (MFA) settings for the user pool.OFF: MFA is disabled for the user pool. Users are not required to set up or use MFA during sign-in.ON: MFA is enabled for the user pool. Users are required to configure MFA during registration and use it during sign-in.OPTIONAL: MFA is optional for the user pool. Users can choose whether to configure MFA during registration, but if they do, they are required to use it during sign-in.
AccountRecoverySetting: This allows us to configure the account recovery settings for the user pool. These settings determine how users can recover access to their accounts.RecoveryMechanisms: An array of recovery mechanisms that users can use to recover their accounts. Each recovery mechanism specifies how users can verify their identity during the account recovery process.Name: The name of the recovery mechanism. It can be one of the following values:verified_email: Users receive a verification code via email.verified_phone_number: Users receive a verification code via SMS to their phone number.admin_only: Account recovery is only available through an administrator.
Priority: An integer value representing the priority of the recovery mechanism. Lower values indicate higher priority.
AutoVerifiedAttributes: Attributes that are automatically verified upon user registration. Possible values areemailandphone_number.AdminCreateUserConfig: Allows us to configure settings related to the creation of the user in the user pool. These settings determine who can create user accounts and under what conditions.AllowAdminCreateUserOnly: When set tofalse, both administrators and users can create user accounts.UnusedAccountValidityDays: An integer value specifying the number of days that an unused account remains valid. If a user account is not used within this period, it will be considered expired.InviteMessageTemplate: The message template to be used for the welcome message to new users.
UserPoolName: A string used to name the user pool.AttributesRequireVerificationBeforeUpdate: This allows us to specify which user attributes require verification before they can be updated. When an attribute requires verification before an update, changes to that attribute by the user will not take effect until the user verifies the changes, typically through a verification code sent via email or SMS.Schema: Allows us to define the schema for the user pool attributes. The schema specifies the attributes that are associated with user profiles in the user pool, including their data types, constraints, and whether they are required.Name: The name of the attribute.AttributeDataType: The data type of the attribute. Valid values includeString,Number,DateTime, andBoolean.Mutable: Indicates whether the attribute is mutable. If set totrue, the attribute can be updated by users. If set tofalse, changes to the attribute require verification.Required: Indicates whether the attribute is required.
EmailConfiguration: This allows us to configure email-related settings for the user pool. These settings determine how Amazon Cognito handles email communication with users, such as sending verification codes, account recovery instructions, and other notifications.ReplyToEmailAddress: The destination to which the receiver of the email should reply.SourceArn: The ARN of a verified email address or an address from a verified domain in Amazon SES.ConfigurationSet: The name of the Amazon SES configuration set to use when sending emails.EmailSendingAccount: Specifies whether Amazon Cognito uses its built-in functionality to send email messages (COGNITO_DEFAULT) or uses our Amazon SES email configuration (DEVELOPER).From: Identifies either the sender's email address or the sender's name with their email address.
User pool client
A user pool app client is a setup within a user pool designed to work with a single application that authenticates through Amazon Cognito.
  UserPoolClient:
    Type: "AWS::Cognito::UserPoolClient"
    Properties:
      ClientName: "myclient"
      GenerateSecret: true
      UserPoolId: !Ref UserPool
      ExplicitAuthFlows:
        - ALLOW_USER_SRP_AUTH
        - ALLOW_REFRESH_TOKEN_AUTH
      SupportedIdentityProviders:
        - COGNITO

Outputs:
  CognitoUserPoolID:
    Value: !Ref UserPool
    Description: The UserPool ID
  CognitoClientID:
    Value: !Ref UserPoolClient
    Description: The app client
Here are the details for the properties used in the AWS::Cognito::UserPoolClient resource:
ClientName: The client name for the user pool client we would like to create.ExplicitAuthFlows: Amazon Cognito user pools API authentication flows we want to support. Valid values include:ALLOW_USER_PASSWORD_AUTH: Enables password-based client-side authentication flow (client-side applications). In this flow, Amazon Cognito receives the password in plain text. This option should only be used with trusted clients.ALLOW_USER_SRP_AUTH: Similar toALLOW_USER_PASSWORD_AUTHbut using the Secure Remote Password (SRP) protocol. SRP is a protocol used for secure password-based authentication. It allows a client to authenticate to a server without transmitting the actual password over the network. Instead, a cryptographic exchange is performed, which allows the server to verify the client's identity without ever seeing the password itself. This option is the best option for untrusted clients.ALLOW_REFRESH_TOKEN_AUTH: When this flag is enabled, it allows the client to use refresh tokens to obtain new ID and access tokens without having to re-authenticate the user.ALLOW_ADMIN_USER_PASSWORD_AUTH: Enable admin user password-based server-side authentication flow (secure backend or server-side applications). This flow should be used in specific scenarios where administrative users need to authenticate using their username and password directly.ALLOW_CUSTOM_AUTH: Enables custom authentication flows within the user pool. Developers can implement custom authentication challenges and responses, allowing for the creation of authentication workflows tailored to specific application requirements using AWS Lambda functions.
GenerateSecret: Specifies whether to generate a client secret for the user pool client.UserPoolId: The user pool ID for the user pool where we want to create a user pool client.SupportedIdentityProviders: Specifies the list of identity providers supported by the client. The following are supported:COGNITO,Facebook,Google,SignInWithApple, andLoginWithAmazon. We can also specify the names we configured for theSAMLandOIDCidentity providers in our user pool.
We added two outputs at the end to get the UserPoolId and the UserPoolClientId. Run the following commands to create the resources:
sam build
sam deploy --guided
Run the following command to get the ClientSecret:
aws cognito-idp describe-user-pool-client --user-pool-id <MY_USER_POOL_ID> --client-id <MY_CLIENT_ID> --query UserPoolClient.ClientSecret
The application client
Run the following commands to set up our project:
dotnet new mvc -n MyWebApp
dotnet add MyWebApp package Amazon.AspNetCore.Identity.Cognito
dotnet add MyWebApp package Amazon.Extensions.CognitoAuthentication
dotnet new sln -n MyWebApp
dotnet sln add --in-root MyWebApp
Open the solution and update the Program.cs file as follows:
var builder = WebApplication.CreateBuilder(args);

builder.Services.AddControllersWithViews();
builder.Services.AddCognitoIdentity();

var app = builder.Build();

if (!app.Environment.IsDevelopment())
{
    app.UseExceptionHandler("/Home/Error");
    app.UseHsts();
}
app.UseHttpsRedirection();
app.UseStaticFiles();
app.UseRouting();
app.UseAuthentication();
app.UseAuthorization();
app.MapControllerRoute(
    name: "default",
    pattern: "{controller=Home}/{action=Index}/{id?}");

app.Run();
The builder.Services.AddCognitoIdentity() configures Amazon Cognito as an identity provider. Open the appsettings.json file to update its content as follows:
{
  "Logging": {
    "LogLevel": {
      "Default": "Information",
      "Microsoft.AspNetCore": "Warning"
    }
  },
  "AllowedHosts": "*",
  "AWS": {
    "Region": "<MY_REGION>",
    "UserPoolClientId": "<MY_CLIENT_ID>",
    "UserPoolClientSecret": "<MY_CLIENT_SECRET>",
    "UserPoolId": "<MY_USER_POOL_ID>",
  }
}
As mentioned earlier, this type of integration requires us to build the UI. In this case, we will implement the following features:
User account registration
Account Confirmation
User login and user logout
The explanation of how to use ASP Core Identity goes beyond the scope of this article, but you can find a great series of articles on that topic here.
User account registration
Create the RegisterViewModel.cs file with the following content:
public class RegisterViewModel
{
    [Required]
    [EmailAddress]
    public string Email { get; set; }
    [Required]
    [DataType(DataType.Password)]
    public string Password { get; set; }
    [DataType(DataType.Password)]
    [Display(Name = "Confirm password")]
    [Compare("Password", ErrorMessage = "Password and confirmation password do not match.")]
    public string ConfirmPassword { get; set; }
}
Create the AccountController.cs file as follows:
public class AccountController : Controller
{
    private readonly UserManager<CognitoUser> _userManager;
    private readonly SignInManager<CognitoUser> _signInManager;
    private readonly IAmazonCognitoIdentityProvider _provider;
    private readonly CognitoUserPool _pool;

    public AccountController(UserManager<CognitoUser> userManager,
        SignInManager<CognitoUser> signInManager, IAmazonCognitoIdentityProvider provider, CognitoUserPool pool)
    {
        _userManager = userManager;
        _signInManager = signInManager;
        _provider = provider;
        _pool = pool;
    }

    [HttpGet]
    public IActionResult Register()
    {
        return View();
    }

    [HttpPost]
    public async Task<IActionResult> Register(RegisterViewModel model)
    {
        if (ModelState.IsValid)
        {
            var user = _pool.GetUser(model.Email);
            var result = await _userManager.CreateAsync(user, model.Password);
            if (result.Succeeded)
            {
                await _signInManager.SignInAsync(user, isPersistent: false);
                return RedirectToAction("Confirm");
            }

            foreach (var error in result.Errors)
            {
                ModelState.AddModelError(string.Empty, error.Description);
            }
        }
        return View(model);
    }
}
Here, we use UserManager<CognitoUser> to register the user in Amazon Cognito and then redirect to the confirm page. Create the Register.cshtml file as follows:
@model RegisterViewModel
@{
    ViewBag.Title = "Register Account";
}
<h1>@ViewData["Title"]</h1>
<div class="row">
    <div class="col-md-4">
        <form method="post">
            <h2>Create a new account.</h2>
            <hr />
            <div asp-validation-summary="ModelOnly" class="text-danger" role="alert"></div>
            <div class="form-floating mb-3">
                <input asp-for="Email" class="form-control" autocomplete="username" aria-required="true" placeholder="name@example.com" />
                <label asp-for="Email">Email</label>
                <span asp-validation-for="Email" class="text-danger"></span>
            </div>
            <div class="form-floating mb-3">
                <input asp-for="Password" class="form-control" autocomplete="new-password" aria-required="true" placeholder="password" />
                <label asp-for="Password">Password</label>
                <span asp-validation-for="Password" class="text-danger"></span>
            </div>
            <div class="form-floating mb-3">
                <input asp-for="ConfirmPassword" class="form-control" autocomplete="new-password" aria-required="true" placeholder="password" />
                <label asp-for="ConfirmPassword">Confirm Password</label>
                <span asp-validation-for="ConfirmPassword" class="text-danger"></span>
            </div>
            <button id="registerSubmit" type="submit" class="w-100 btn btn-lg btn-primary">Register</button>
        </form>
    </div>
</div>
Account confirmation
Create the ConfirmViewModel.cs file with the following content:
public class ConfirmViewModel
{
    [Required]
    public string Code { get; set; }
}
Add the following methods to the AccountController.cs:
    [HttpGet]
    public IActionResult Confirm()
    {
        return View();
    }

    [HttpPost]
    public async Task<IActionResult> Confirm(ConfirmViewModel model)
    {
        if (ModelState.IsValid)
        {
            var userManager = _userManager as CognitoUserManager<CognitoUser>;
            var userId = User.FindFirstValue(ClaimTypes.NameIdentifier);
            var user = await _userManager.FindByIdAsync(userId);
            if (user == null)
            {
                return NotFound($"Unable to load user with ID '{userId}'.");
            }
            var result = await userManager.ConfirmSignUpAsync(user, model.Code, true);
            if (!result.Succeeded)
            {
                foreach (var error in result.Errors)
                {
                    ModelState.AddModelError(string.Empty, error.Description);
                }
            }
            else
            {
                return RedirectToAction(nameof(HomeController.Index), "Home");
            }
        }
        return View(model);
    }
The UserManager<CognitoUser> lacks an abstraction to confirm the account. Because of this, we need to cast it to the underlying objectCognitoUserManager<CognitoUser> to gain access to the required method. Create the Confirm.cshtml file as follows:
@model ConfirmViewModel
@{
    ViewBag.Title = "Confirm Account";
}
<h1>@ViewData["Title"]</h1>
<div class="row">
    <div class="col-md-4">
        <form method="post">
            <h2>Confirm your account.</h2>
            <hr />
            <div asp-validation-summary="ModelOnly" class="text-danger" role="alert"></div>
            <div class="form-floating mb-3">
                <input asp-for="Code" class="form-control" aria-required="true" />
                <label asp-for="Code">Verification Code</label>
                <span asp-validation-for="Code" class="text-danger"></span>
            </div>
            <button id="confirmSubmit" type="submit" class="w-100 btn btn-lg btn-primary">Confirm account</button>
        </form>
    </div>
</div>
User login and user logout
Create the ConfirmViewModel.cs file with the following content:
public class LoginViewModel
{
    [Required]
    [EmailAddress]
    public string Email { get; set; }
    [Required]
    [DataType(DataType.Password)]
    public string Password { get; set; }
    [Display(Name = "Remember Me")]
    public bool RememberMe { get; set; }
}
Add the following methods to the AccountController.cs:
    [HttpPost]
    public async Task<IActionResult> Logout()
    {
        await _signInManager.SignOutAsync();
        return RedirectToAction("index", "home");
    }

    [HttpGet]
    public IActionResult Login()
    {
        return View();
    }

    [HttpPost]
    public async Task<IActionResult> Login(LoginViewModel model)
    {
        if (ModelState.IsValid)
        {
            var result = await _signInManager.PasswordSignInAsync(model.Email, model.Password, model.RememberMe, lockoutOnFailure: false);
            if (result.Succeeded)
            {
                return RedirectToAction(nameof(HomeController.Index), "Home");
            }
            else
            {
                ModelState.AddModelError(string.Empty, "Invalid login attempt.");
                return View(model);
            }
        }

        return View(model);
    }
Create the Login.cshtml file as follows:
@model LoginViewModel
@{
    ViewBag.Title = "Log in";
}
<h1>@ViewData["Title"]</h1>
<div class="row">
    <div class="col-md-4">
        <section>
            <form id="account" method="post">
                <h2>Use an account to log in.</h2>
                <hr />
                <div asp-validation-summary="ModelOnly" class="text-danger" role="alert"></div>
                <div class="form-floating mb-3">
                    <input asp-for="Email" class="form-control" autocomplete="username" aria-required="true" placeholder="name@example.com" />
                    <label asp-for="Email" class="form-label">Email</label>
                    <span asp-validation-for="Email" class="text-danger"></span>
                </div>
                <div class="form-floating mb-3">
                    <input asp-for="Password" class="form-control" autocomplete="current-password" aria-required="true" placeholder="password" />
                    <label asp-for="Password" class="form-label">Password</label>
                    <span asp-validation-for="Password" class="text-danger"></span>
                </div>
                <div class="checkbox mb-3">
                    <label asp-for="RememberMe" class="form-label">
                        <input class="form-check-input" asp-for="RememberMe" />
                        @Html.DisplayNameFor(m => m.RememberMe)
                    </label>
                </div>
                <div>
                    <button id="login-submit" type="submit" class="w-100 btn btn-lg btn-primary">Log in</button>
                </div>
            </form>
        </section>
    </div>
</div>

@section Scripts {
    <partial name="_ValidationScriptsPartial" />
}
Finally, update the _Layout.cshtml as follows:
@using Microsoft.AspNetCore.Identity
@using Amazon.Extensions.CognitoAuthentication
@using System.Security.Claims
@inject SignInManager<CognitoUser> SignInManager
@inject UserManager<CognitoUser> UserManager
<!DOCTYPE html>
<html lang="en">
<head>
<meta charset="utf-8" />
<meta name="viewport" content="width=device-width, initial-scale=1.0" />
<title>@ViewData["Title"] - MyWebApp</title>
<link rel="stylesheet" href="~/lib/bootstrap/dist/css/bootstrap.min.css" />
<link rel="stylesheet" href="~/css/site.css" asp-append-version="true" />
<link rel="stylesheet" href="~/MyWebApp.styles.css" asp-append-version="true" />
</head>
<body>
<header>
<nav class="navbar navbar-expand-sm navbar-toggleable-sm navbar-light bg-white border-bottom box-shadow mb-3">
<div class="container-fluid">
<a class="navbar-brand" asp-area="" asp-controller="Home" asp-action="Index">MyWebApp</a>
<button class="navbar-toggler" type="button" data-bs-toggle="collapse" data-bs-target=".navbar-collapse" aria-controls="navbarSupportedContent"
aria-expanded="false" aria-label="Toggle navigation">
<span class="navbar-toggler-icon"></span>
</button>
<div class="navbar-collapse collapse d-sm-inline-flex justify-content-between">
<ul class="navbar-nav flex-grow-1">
<li class="nav-item">
<a class="nav-link text-dark" asp-area="" asp-controller="Home" asp-action="Index">Home</a>
</li>
<li class="nav-item">
<a class="nav-link text-dark" asp-area="" asp-controller="Home" asp-action="Privacy">Privacy</a>
</li>
</ul>
<ul class="navbar-nav">
@if (SignInManager.IsSignedIn(User))
{
<li class="nav-item">
<span class="nav-link text-dark">Hello @User.FindFirstValue(ClaimTypes.Email)!</span>
</li>
<li class="nav-item">
<form id="logoutForm" class="form-inline" asp-area="" asp-controller="Account" asp-action="Logout" asp-route-returnUrl="@Url.Action("Index", "Home", new { area = "" })">
<button id="logout" type="submit" class="nav-link btn btn-link text-dark border-0">Logout</button>
</form>
</li>
}
else
{
<li class="nav-item">
<a class="nav-link text-dark" id="register" asp-area="" asp-controller="Account" asp-action="Register">Register</a>
</li>
<li class="nav-item">
<a class="nav-link text-dark" id="login" asp-area="" asp-controller="Account" asp-action="Login">Login</a>
</li>
}
</ul>
</div>
</div>
</nav>
</header>
<div class="container">
<main role="main" class="pb-3">
@RenderBody()
</main>
</div>
<footer class="border-top footer text-muted">
<div class="container">
© 2024 - MyWebApp - <a asp-area="" asp-controller="Home" asp-action="Privacy">Privacy</a>
</div>
</footer>
<script src="~/lib/jquery/dist/jquery.min.js"></script>
<script src="~/lib/bootstrap/dist/js/bootstrap.bundle.min.js"></script>
<script src="~/js/site.js" asp-append-version="true"></script>
@await RenderSectionAsync("Scripts", required: false)
</body>
</html>
Running the application
Run the application and go to the register option:
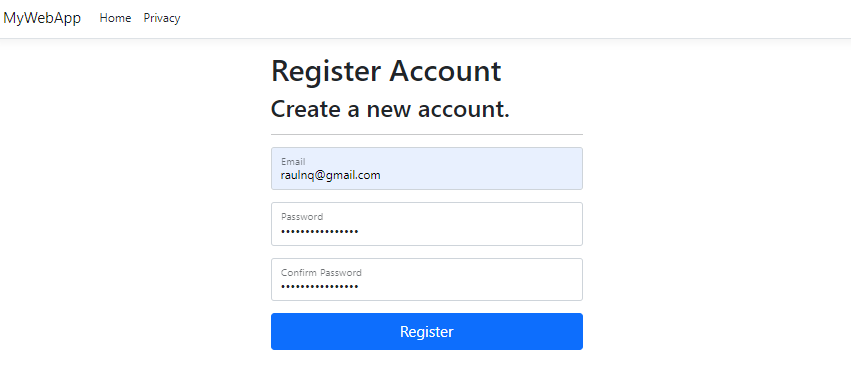
Fill out the form and wait for the verification code:
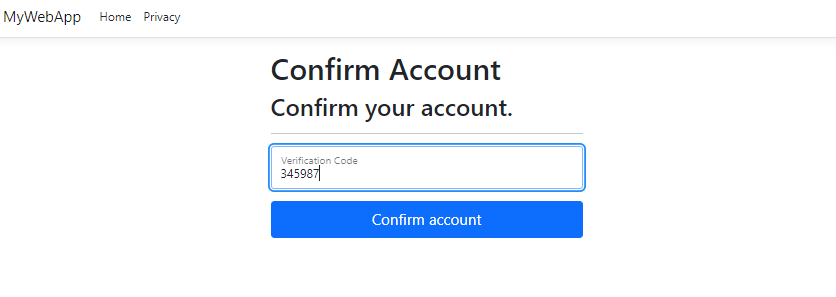
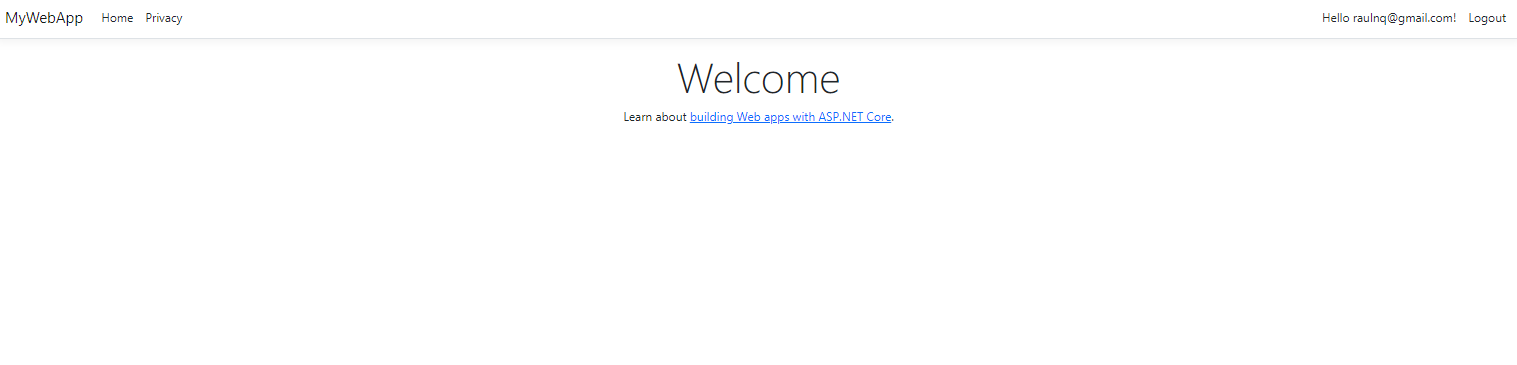
Mission accomplished: the user account has been created and the user is now authenticated.
As we can see, integrating this type of user management functionality requires a significant amount of effort on our part, which is why we do not recommend it. In our upcoming articles, we will explore an option that simplifies this process for us. All the code can be found here. Thanks, and happy coding.


