Getting Started with Azure Bicep

Somebody who likes to code
Azure Bicep is a domain-specific language (DSL) designed for deploying and managing Azure resources. It offers several advantages, including a more concise syntax compared to ARM templates, improved readability, enhanced maintainability, and a gentler learning curve.
How Does it Work?
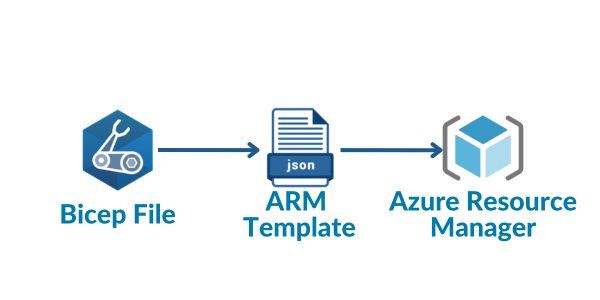
A Bicep file is automatically converted into an ARM template (JSON) when a deployment is submitted to Azure.
Pre-requisites
Ensure you have an Azure Account
Install Azure CLI
Install Bicep CLI (
az bicep install)Check out our Getting Started with ARM Templates guide if you're unfamiliar with the basics of ARM templates.
Resources
The syntax for defining a resource is:
resource <symbolic-name> '<full-type-name>@<api-version>' = {
  <resource-properties>
}
To define a resource, use the resource keyword followed by:
<symbolic-name>: The symbolic name isn't the same as the resource name, and it is used to reference the resource in other sections of your Bicep file.<full-type-name>and<api-version>: For the available resource types and versions, see Bicep resource reference.<resource-properties>:nameandlocationare properties that can be found in nearly every resource. After setting those values, we need to set the properties that are specific to the resource type we are using.
Create a main.bicep file with the following content:
resource storageAccount 'Microsoft.Storage/storageAccounts@2022-09-01' = {
  name: 'myuniquestorage001'
  location: resourceGroup().location
  kind: 'StorageV2'
  sku: {
    name: 'Standard_GRS'
  }
}
Execute the command az group create -l eastus -n MyResourceGroup to create the resource group where our resources will be stored. Afterward, run the following command:
az deployment group create --resource-group MyResourceGroup --template-file .\main.bicep
Parameters
The syntax for defining a parameter is:
@<decorator-name>
param <parameter-name> <parameter-data-type> = <default-value>
To define a parameter, use the param keyword followed by:
<parameter-name>: The name of the parameter. It cannot have the same name as a variable, resource, output, or another parameter in the same scope.<parameter-type>: We can find the complete list of data types here.<default-value>: The default value is used when a value is not supplied during deployment.<decorator-name>: Parameters use decorators for constraints or metadata. The list of decorators can be found here.
Update the main.bicep file with the following content:
@description('storage account name')
param storageAccountName string = 'myuniquestorage001'

@description('storage account location')
param location string = resourceGroup().location

resource storageAccount 'Microsoft.Storage/storageAccounts@2022-09-01' = {
  name: storageAccountName
  location: location
  kind: 'StorageV2'
  sku: {
    name: 'Standard_GRS'
  }
}
To pass inline parameters, you can execute a command like this:
az deployment group create --resource-group MyResourceGroup --template-file .\main.bicep --parameters storageAccountName='myuniquestorage002'
Variables
The syntax for defining a variable is:
var <variable-name> = <variable-value>
To define a variable, use the var keyword followed by:
<variable-name>: A variable cannot share the same name as a parameter, module, or resource.<variable-value>: Note that we do not need to specify a data type for the variable. The type is inferred from the value provided.
Update the main.bicep file using the following content:
@description('storage account prefix')
param storageAccountPrefix string

@description('storage account location')
param location string = resourceGroup().location

var storageAccountName = '${toLower(storageAccountPrefix)}${uniqueString(resourceGroup().id)}'

resource storageAccount 'Microsoft.Storage/storageAccounts@2022-09-01' = {
  name: storageAccountName
  location: location
  kind: 'StorageV2'
  sku: {
    name: 'Standard_GRS'
  }
}
Execute the following command:
az deployment group create --resource-group MyResourceGroup --template-file .\main.bicep --parameters storageAccountPrefix='mystorage'
Outputs
The syntax for defining an output is:
output <output-name> <output-data-type> = <output-value>
To define a variable, use the output keyword followed by:
<output-name>: An output can have the same name as a parameter, variable, module, or resource.<output-data-type>: Can use the same data types of the parameters.<output-value>: The value we want to expose.
Update the main.bicep file with the content provided below:
@description('storage account prefix')
param storageAccountPrefix string

@description('storage account location')
param location string = resourceGroup().location

var storageAccountName = '${toLower(storageAccountPrefix)}${uniqueString(resourceGroup().id)}'

resource storageAccount 'Microsoft.Storage/storageAccounts@2022-09-01' = {
  name: storageAccountName
  location: location
  kind: 'StorageV2'
  sku: {
    name: 'Standard_GRS'
  }
}

output endpoints object = storageAccount.properties.primaryEndpoints
Execute the following command to deploy the resource and filter the output (How to query Azure CLI command output using a JMESPath query):
az deployment group create --resource-group MyResourceGroup --template-file .\main.bicep --parameters storageAccountPrefix='mystorage' --query "properties.outputs"
In conclusion, by understanding the core concepts of resources, parameters, variables, and outputs, you can effectively leverage Bicep to streamline your Azure deployments and make your infrastructure as code more accessible and maintainable. We encourage you to check the official documentation here to explore the full potential of this tool. Thanks, and happy coding.


