Hosting Static Websites on AWS S3 with Terraform
Somebody who likes to code
AWS offers several hosting solutions for our static websites, which can make it difficult to select the best option based on our needs. In this context, AWS S3 stands out as the simplest solution for hosting static websites for several reasons:
Cost-Effectiveness: We only pay for the storage you use and the data transfer out of AWS S3. This makes it extremely cost-effective, especially for smaller websites or those with fluctuating traffic.
Scalability: AWS S3 is designed to handle virtually unlimited amounts of traffic without any need for intervention or provisioning on our part.
High Availability: AWS S3 boasts high availability, meaning our website will experience minimal downtime. Our website will be hosted across multiple availability zones, ensuring redundancy and fault tolerance.
Durability: AWS S3 offers outstanding durability for our website content. It replicates data across multiple devices and facilities within a region to protect against data loss.
Simplicity: Setting up a static website on AWS S3 is straightforward, requiring minimal configuration.
Integration: AWS S3 integrates seamlessly with other AWS services like CloudFront for content delivery and Route 53 for DNS management. This allows us to enhance our website by leveraging the capabilities of these complementary services.
In this post, we will create a Terraform script to host a static website in an AWS S3 and enable browsing the website through a custom domain.
Pre-requisites
An IAM User with programmatic access.
Install the AWS CLI.
Install Terraform CLI.
A Route 53 hosted zone.
The Static Website
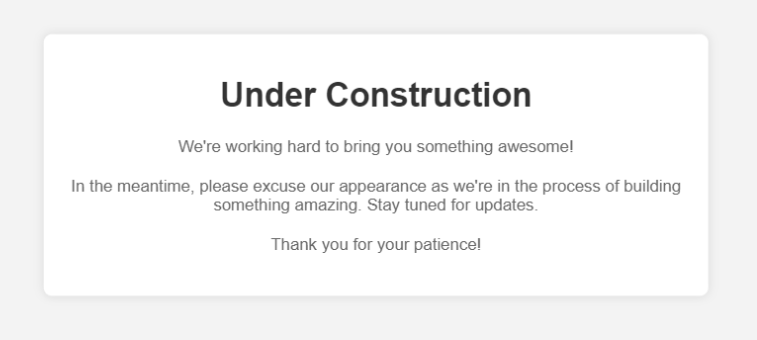
In a site folder, create an index.html file with the following content:
<!DOCTYPE html>
<html lang="en">
<head>
    <meta charset="UTF-8">
    <meta name="viewport" content="width=device-width, initial-scale=1.0">
    <title>Under Construction</title>
    <style>
        body {
            font-family: Arial, sans-serif;
            background-color: #f3f3f3;
            margin: 0;
            padding: 0;
            display: flex;
            justify-content: center;
            align-items: center;
            height: 100vh;
        }
        .container {
            max-width: 600px;
            padding: 20px;
            background-color: #fff;
            border-radius: 8px;
            box-shadow: 0 0 10px rgba(0, 0, 0, 0.1);
            text-align: center;
            animation: pulse 1.5s infinite alternate;
        }
        @keyframes pulse {
            0% {
                transform: scale(1);
            }
            100% {
                transform: scale(1.05);
            }
        }
        h1 {
            color: #333;
        }
        p {
            color: #666;
            margin-bottom: 20px;
        }
    </style>
</head>
<body>
    <div class="container">
        <h1>Under Construction</h1>
        <p>We're working hard to bring you something awesome!</p>
        <p>In the meantime, please excuse our appearance as we're in the process of building something amazing. Stay tuned for updates.</p>
        <p>Thank you for your patience!</p>
    </div>
</body>
</html>
The Terraform Script
Create a main.tf file with the following content:
terraform {
  required_providers {
    aws = {
      source = "hashicorp/aws"
      version = "5.31.0"
    }
  }
  backend "local" {}
}

provider "aws" {
  region      = "<MY_REGION>"
  profile     = "<MY_AWS_PROFILE>"
  max_retries = 2
}
Here, we are simply defining the provider to interact with AWS.
locals {
  bucket_name             = "<MY_BUCKET_NAME>"
  zone_id                 = "<MY_ROUTE53_HOSTED_ZONE_ID>"
}
The locals section can be replaced with variables if needed.
data "aws_route53_zone" "zone" {
  zone_id      = local.zone_id
  private_zone = false
}
The data source allows us to find a hosted zone given the hosted zone id.
resource "aws_s3_bucket" "bucket" {
  bucket = "${local.bucket_name}.${data.aws_route53_zone.zone.name}"
  force_destroy = true
}
We create a bucket with the same name as the custom domain we will register in Route53, which is mandatory.
resource "aws_s3_bucket_public_access_block" "bucket-access-block" {
  bucket                  = aws_s3_bucket.bucket.id
  ignore_public_acls      = false
  block_public_acls       = false
  restrict_public_buckets = false
  block_public_policy     = false
}
We disable the Block all public access option for the bucket.
resource "aws_s3_bucket_website_configuration" "website-config" {
  bucket = aws_s3_bucket.bucket.id
  index_document {
    suffix = "index.html"
  }
}
We set up the bucket as a static website.
data "aws_iam_policy_document" "bucket-policy-document" {
  statement {
    sid    = "AllowPublicRead"
    effect = "Allow"
    resources = [
      "${aws_s3_bucket.bucket.arn}/*",
    ]
    actions = ["S3:GetObject"]
    principals {
      type        = "AWS"
      identifiers = ["*"]
    }
  }
}

resource "aws_s3_bucket_policy" "bucket-policy" {
  bucket = aws_s3_bucket.bucket.id
  policy = data.aws_iam_policy_document.bucket-policy-document.json
}
We set up a policy that provides read access to the bucket and all the objects within it.
resource "aws_route53_record" "record" {
  zone_id = data.aws_route53_zone.zone.zone_id
  name    = "${local.bucket_name}.${data.aws_route53_zone.zone.name}"
  type    = "A"

  alias {
    name                   = aws_s3_bucket_website_configuration.website-config.website_domain
    zone_id                = aws_s3_bucket.bucket.hosted_zone_id
    evaluate_target_health = false
  }
}
We create a Route 53 A record, using the same name as the bucket, to map the custom domain to the AWS S3 bucket.
resource "aws_s3_object" "html-files" {
  for_each = fileset("./site/", "*.html")
  bucket = aws_s3_bucket.bucket.id
  key = each.value
  content_type    = "text/html"
  source = "./site/${each.value}"
  etag = filemd5("./site/${each.value}")
}
We also need to upload our website files. The fileset function returns a set of file paths that match a specific pattern in a given base directory. AWS S3 assigns a default content type of binary/octet-stream to any uploaded files, so make sure to set the correct content_type for each file type.
output "website_endpoint" {
  value = aws_s3_bucket_website_configuration.website-config.website_endpoint
}

output "route53_name" {
  value = aws_route53_record.record.name
}
We create two outputs to display the URLs that can be used to access our static website. Run the following commands to start the deployment:
terraform init
terraform plan -out app.tfplan
terraform apply 'app.tfplan'
Browse to the output URLs to view the static website up and running (the custom domain may take a few minutes to propagate):
Hosting a static website on AWS S3 with Terraform is an excellent choice for simple websites that don't require server-side processing or dynamic content, like most SPAs. You can see the final main.tf file here. Thanks, and happy coding.


