Migrating data from Azure Blob Storage to AWS S3 with AWS DataSync
Somebody who likes to code
Migrating data between different cloud storage services can be a complex and time-consuming task. In this post, we'll explore how to efficiently transfer data from Azure Blob Storage to AWS S3 using AWS DataSync, a powerful and secure solution for simplifying the migration process.
AWS DataSync is an online data movement and discovery service that simplifies data migration and helps you quickly, easily, and securely transfer your file or object data to, from, and between AWS storage services.
Concepts
Agent: An agent is a self-hosted virtual machine (VM) that is utilized for reading or writing data from the storage system.
Location: A location specifies where you want to copy data from or to (source and destination).
Task: It specifies a source and destination location, along with the configuration that determines how data is transferred.
Task Execution: This is an individual run of a task.
Pre-requisites
Ensure you have an IAM User with programmatic access.
Ensure you have an Azure Account
Install Azure CLI
Install AWS CLI
Install AzCopy
The following Windows features will need to be enabled on your local machine:
Hyper-V Module for Windows PowerShell
Hyper-V Services
Preparing the source: Azure Blob Storage
Log into Azure by running az login and create and storage account using the following commands:
az group create -l eastus -n MyResourceGroup
az storage account create --name 24f12674a14143d --resource-group MyResourceGroup --location eastus --sku Standard_ZRS --encryption-services blob
Next, create a container within the storage account:
$assignee = az ad signed-in-user show --query id -o tsv
az role assignment create --role "Storage Blob Data Contributor" --assignee $assignee --scope "/subscriptions/e759b3f9-6ac3-4f9d-b479-1ba4471235cd/resourceGroups/MyResourceGroup/providers/Microsoft.Storage/storageAccounts/24f12674a14143d"
az storage container create --account-name 24f12674a14143d --name mycontainer --auth-mode login
Upload a file within:
New-Item myFile.txt
az storage blob upload --account-name 24f12674a14143d --container-name mycontainer --name myFile.txt --file myFile.txt --auth-mode login
Preparing the destination: AWS S3
Run the following command to create a bucket:
aws s3api create-bucket --bucket my-destination-989282 --region us-east-2 --create-bucket-configuration LocationConstraint=us-east-2
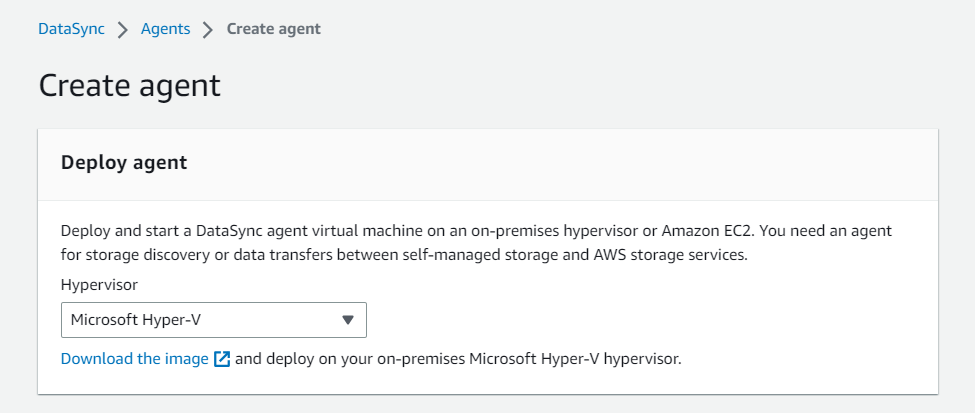
Creating the Agent
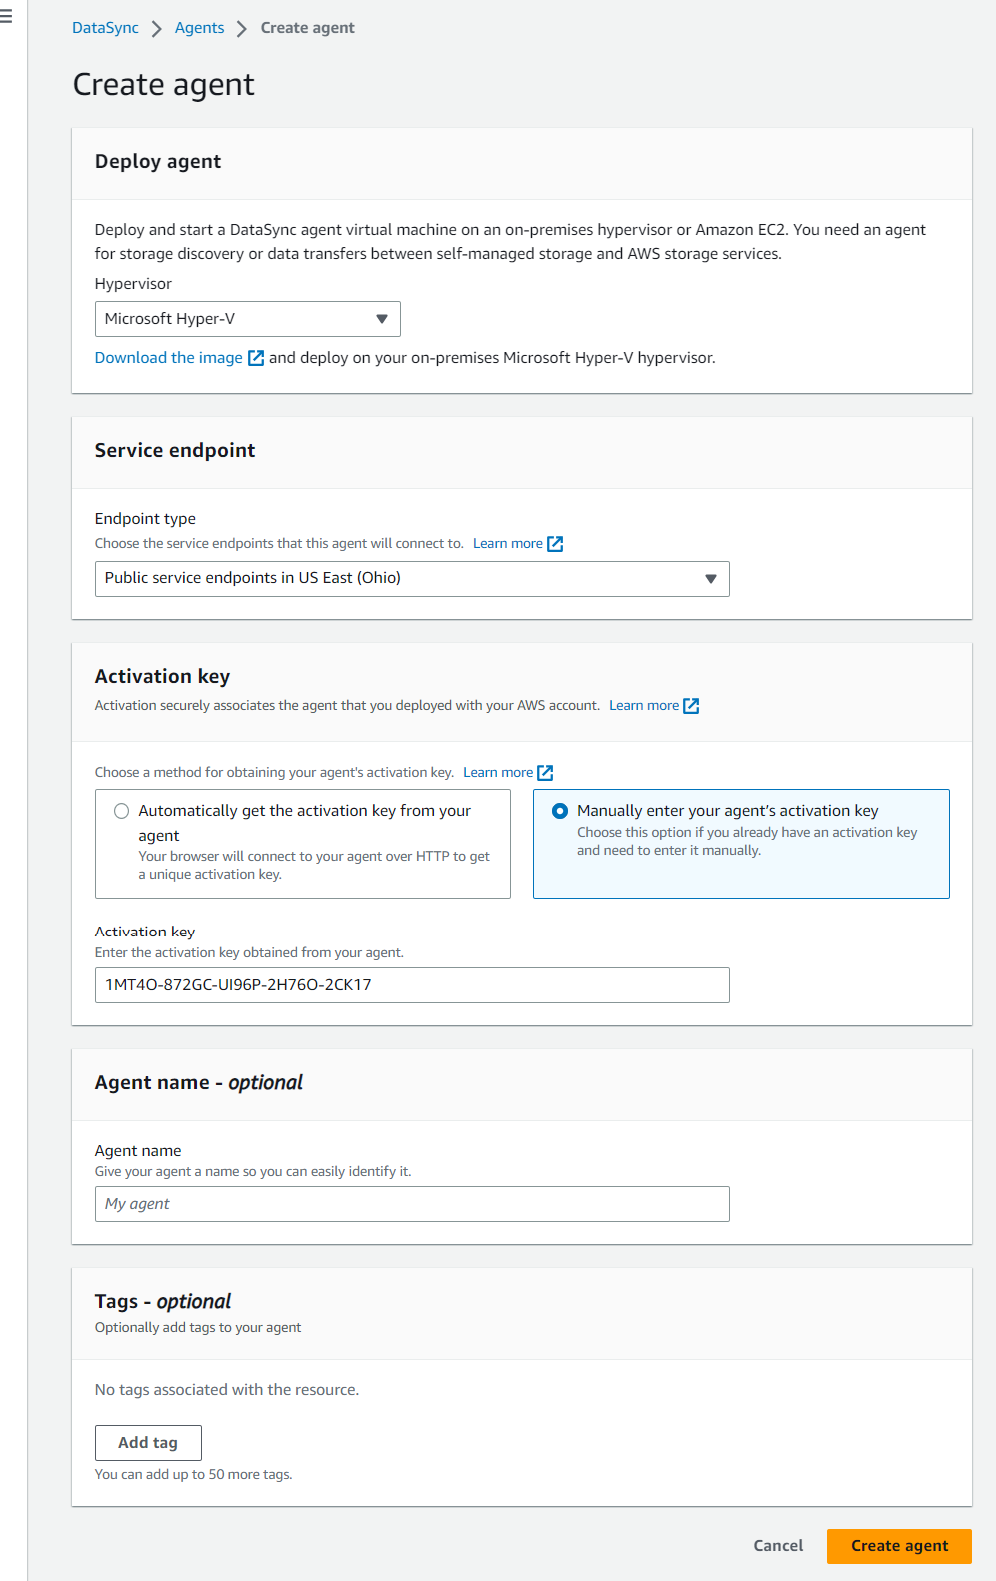
To create a DataSync Agent on Azure, first, download its VM image from AWS. Navigate to AWS DataSync, create a new agent, and select Microsoft Hyper-V as Hypervisor:
Extract the VHDX image file(VHDX is a file format that describes a virtual hard disk) and convert it to VHD format:
Convert-VHD -Path aws-datasync-2.0.1678813931.1-x86_64.xfs.gpt.vhdx -DestinationPath aws-datasync-2016788139311-x86_64.vhd -VHDType Fixed
Let's upload the VHD file to managed disk on Azure (run ls to obtain the VHD file size in bytes):
az disk create -n MyDisk -g MyResourceGroup -l eastus --upload-type Upload --upload-size-bytes 85899346432 --sku standard_lrs
Generate a writable shared access signature (SAS):
az disk grant-access -n MyDisk -g MyResourceGroup --access-level Write --duration-in-seconds 86400
Upload the VHD to the managed disk:
./AzCopy.exe copy "aws-datasync-2.0.1686143940.1-x86_64.vhd" "https://md-impexp-r3jbg4mth1f3.z38.blob.storage.azure.net/c5qllmmcgfh5/abcd?sv=2018-03-28&sr=b&si=2bb3a8bf-68d5-444b-8fee-a704d4223128&sig=MMaPZAc6aibl6KV3tq%2FVeiXQ94nZj%2BPMZXA1WaxSG7A%3D" --blob-type PageBlob
Revoke the SAS (don't forget this step):
az disk revoke-access -n MyDisk -g MyResourceGroup
Create the VM using the managed disk (the VM must meet the requirements specified here):
az vm create --resource-group MyResourceGroup --location eastus --name myVM --size Standard_E4as_v4 --os-type linux --attach-os-disk myDisk
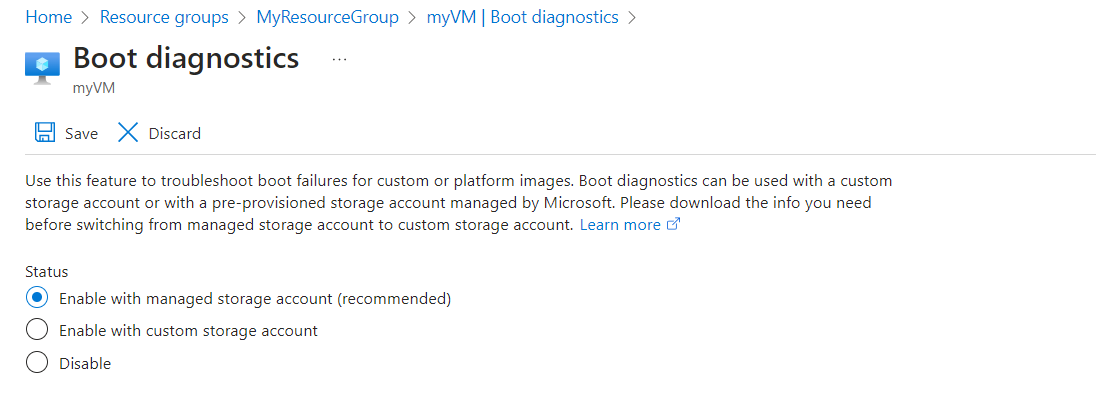
Navigate to our VM in the Azure Portal and Enable the boot diagnostics:
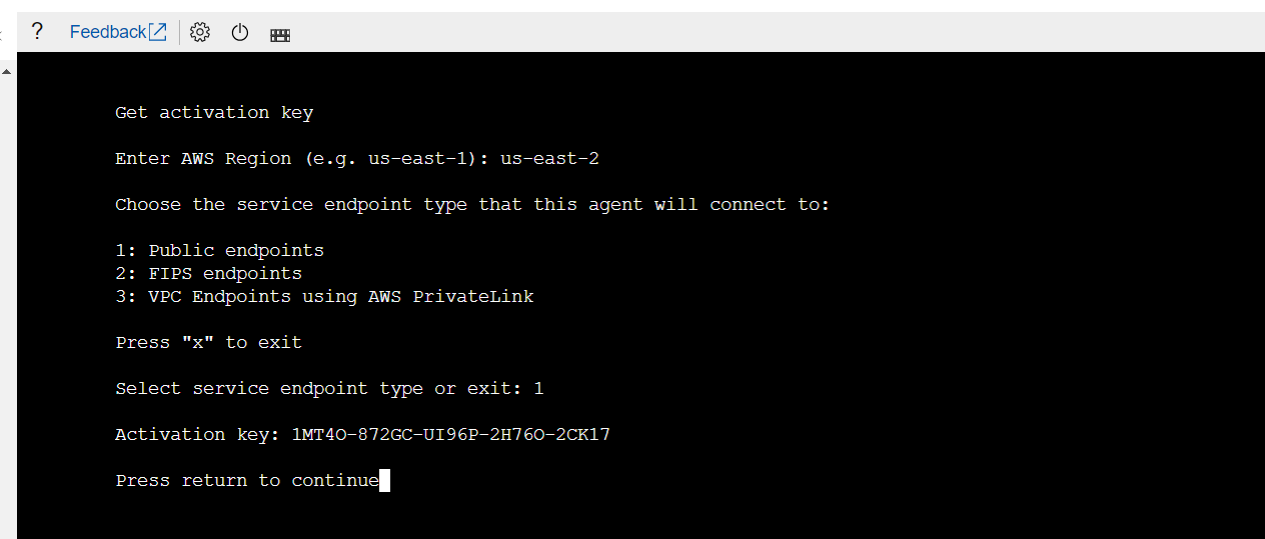
Navigate to the Serial Console, and enter the credentials: login admin and password password:
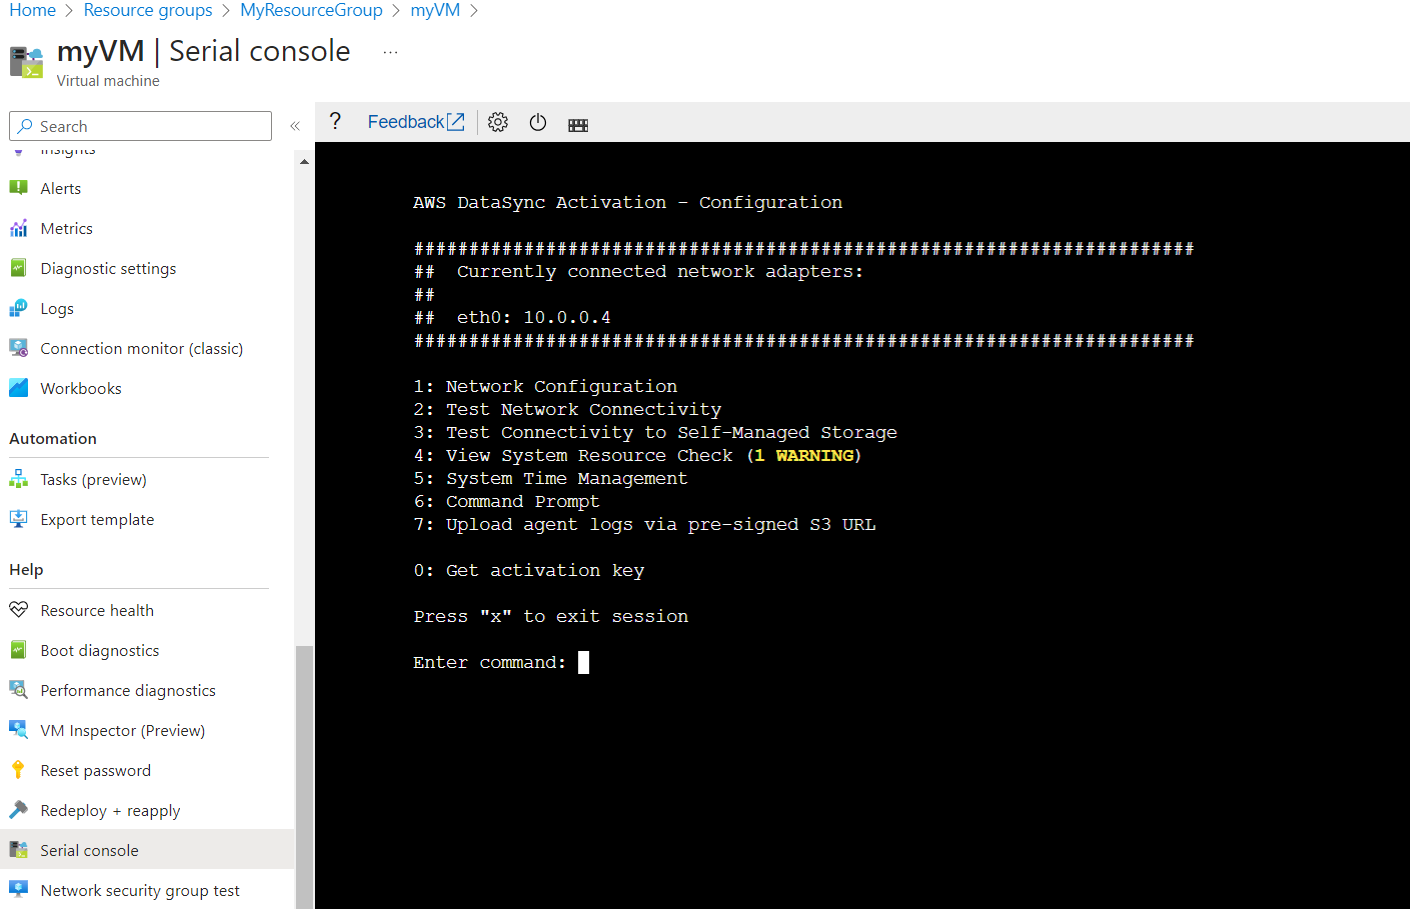
Enter 0 to get the activation key, and then follow the instructions:
Return to the AWS Console and create the agent using the activation key (and the same service endpoint type):
Setting up the source Location
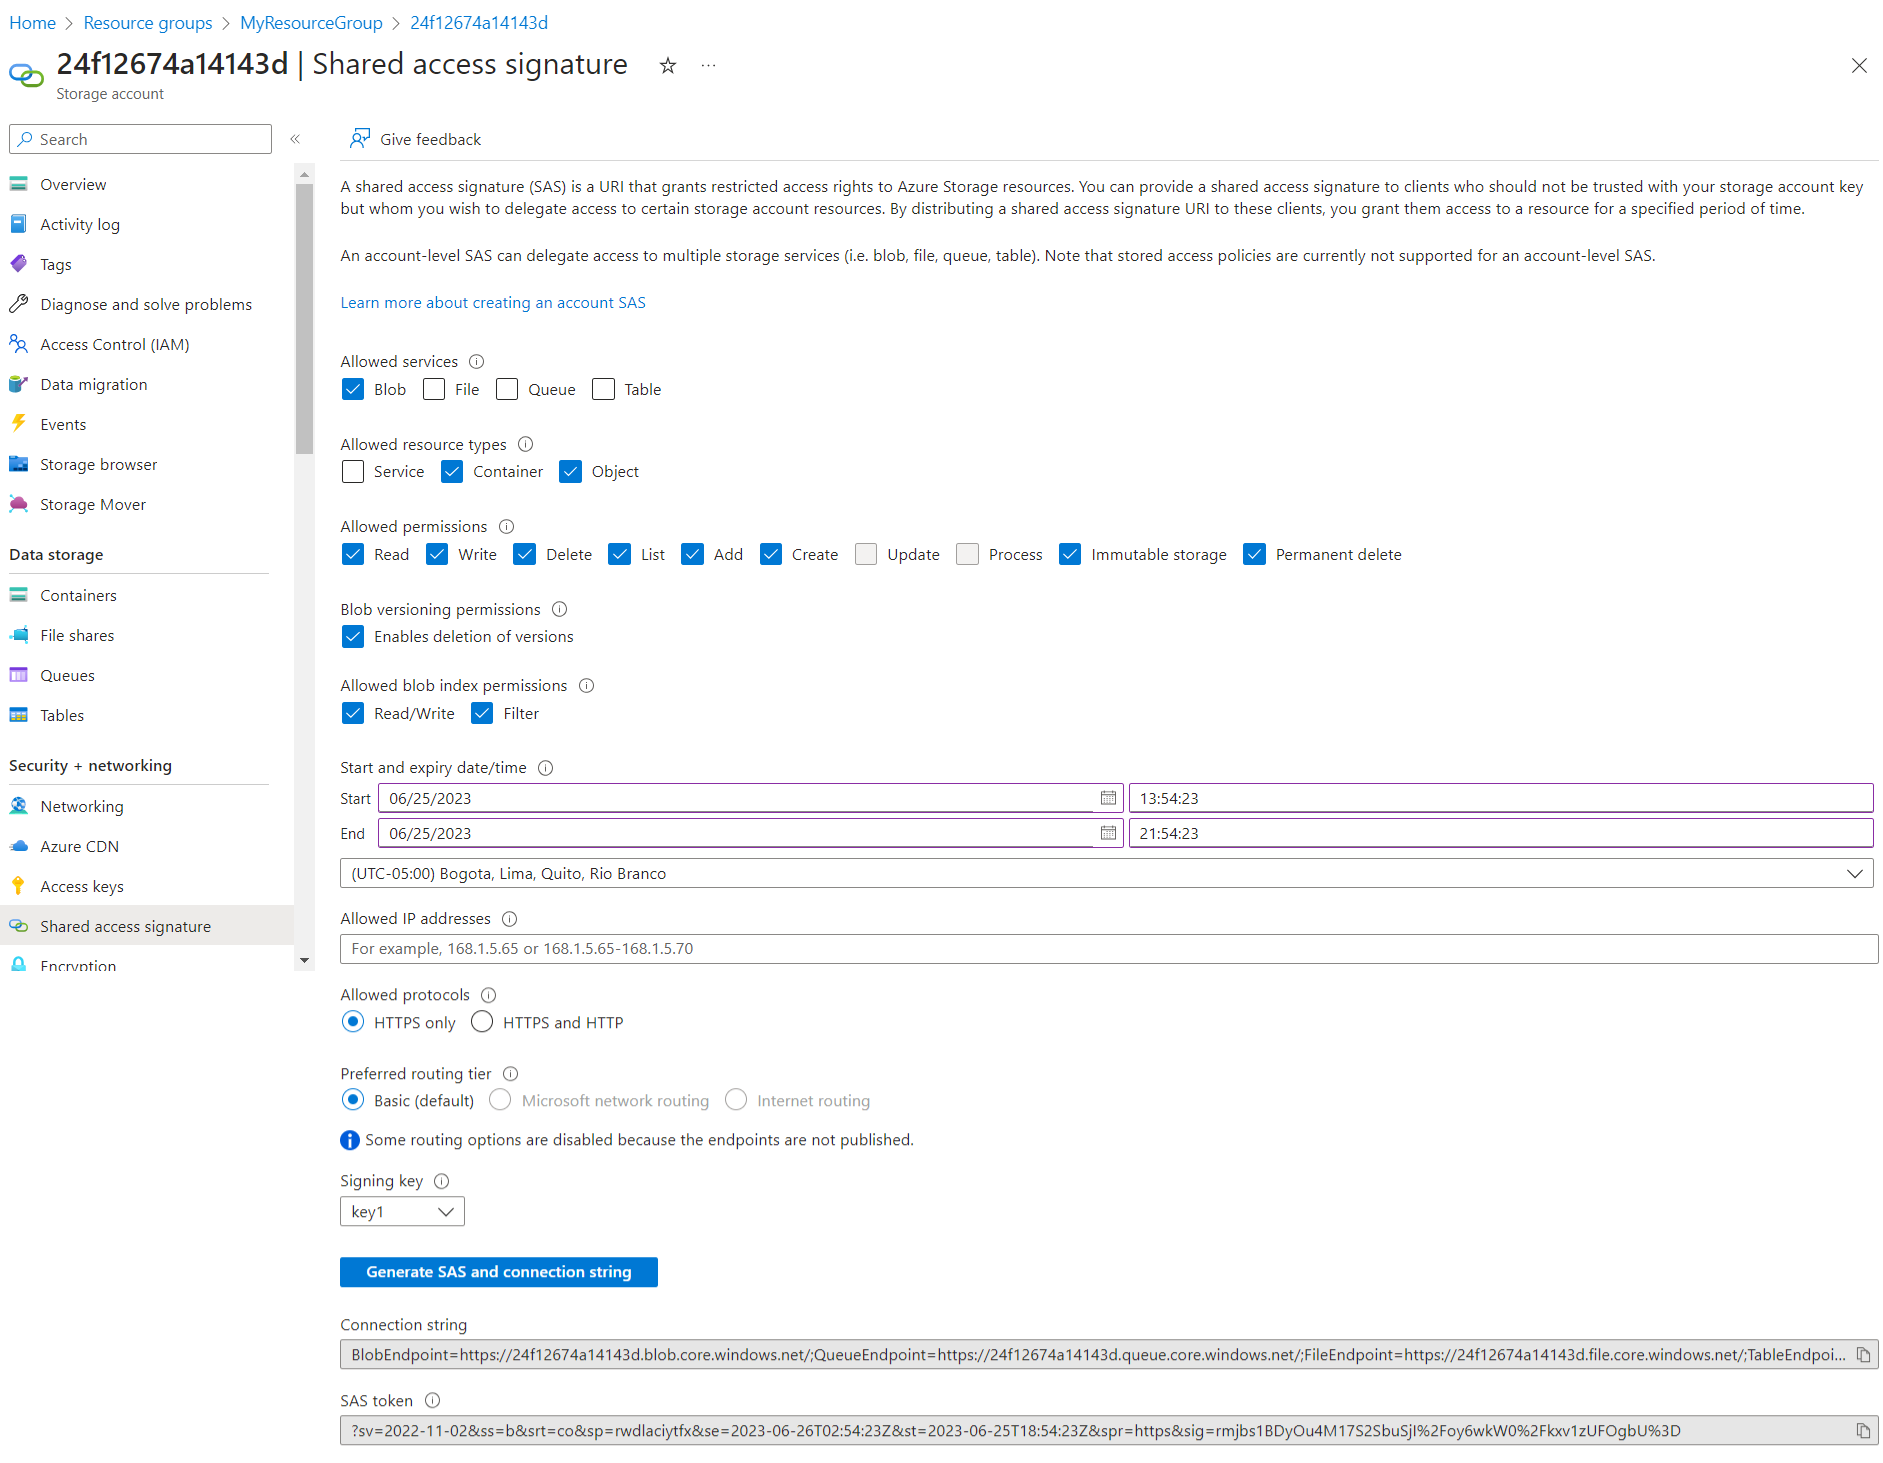
Navigate to the Azure Portal to get a SAS token for the storage account:
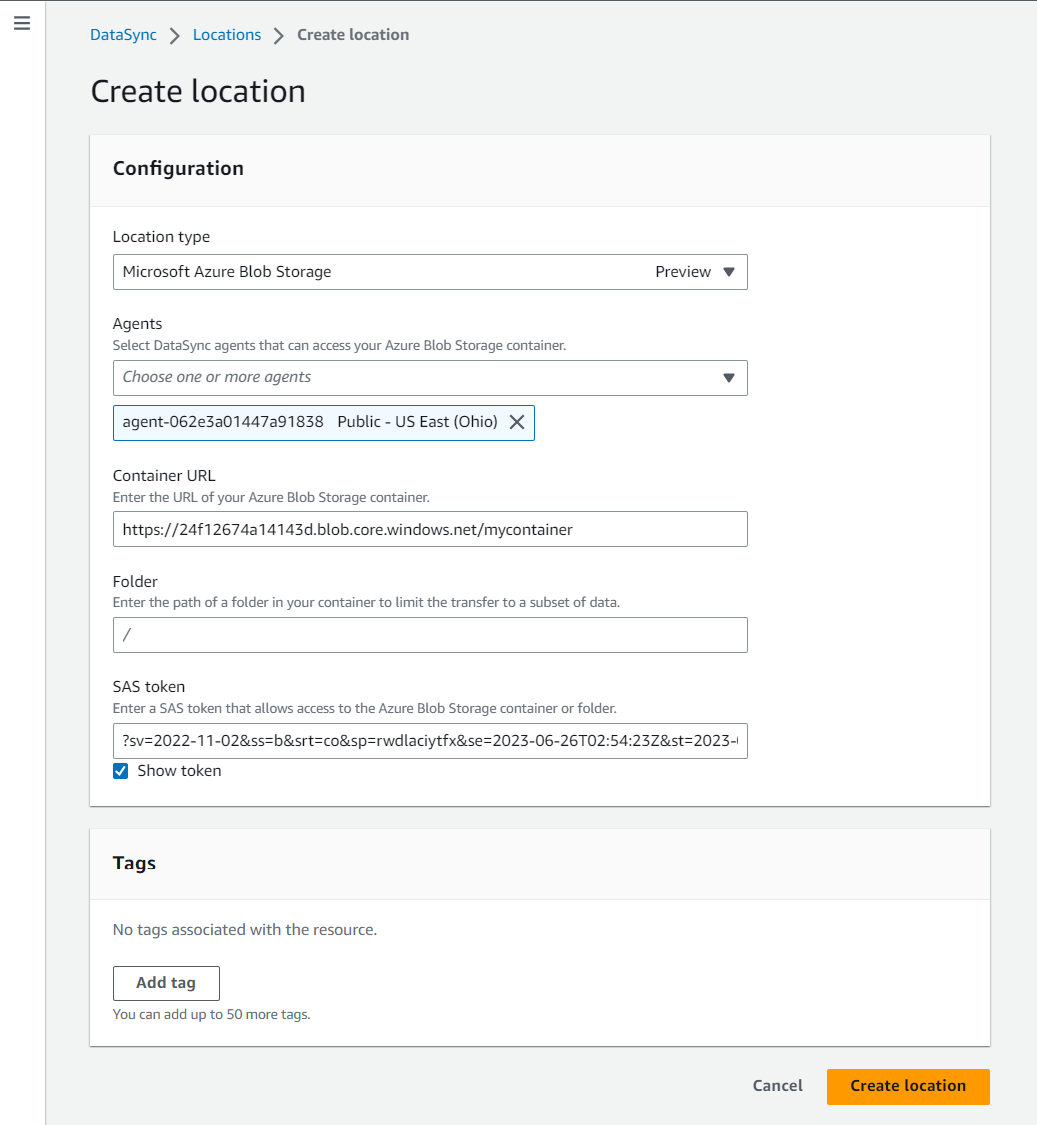
Navigate to the AWS Console and create a Microsoft Azure Blob Storage location:
Setting up the destination Location
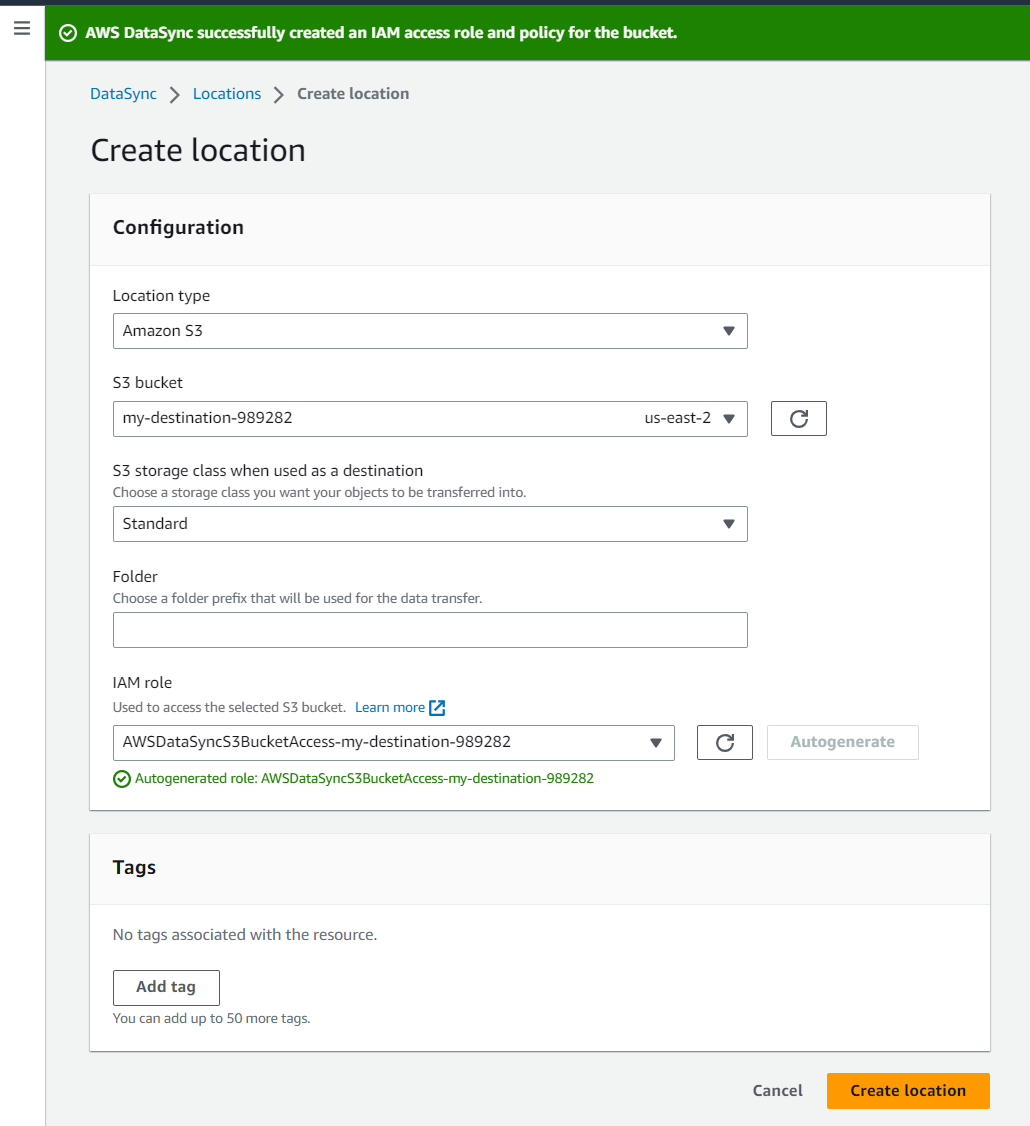
Create an Amazon S3 location (autogenerate the IAM role):
Creating a Task
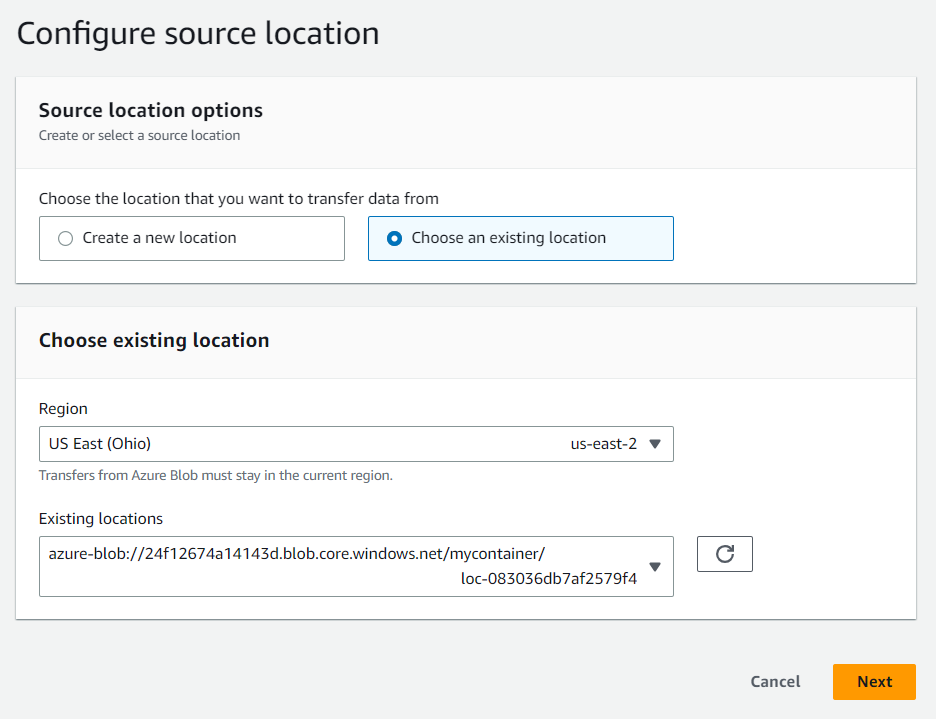
Select the source:
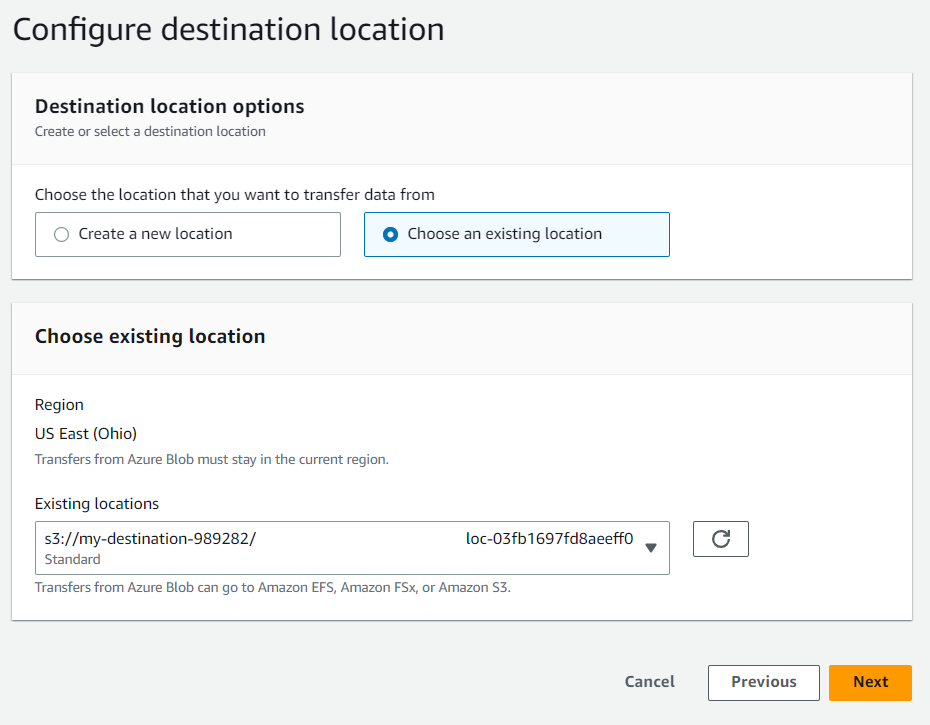
Select the destination:
Configure the remaining settings:

Starting the Task
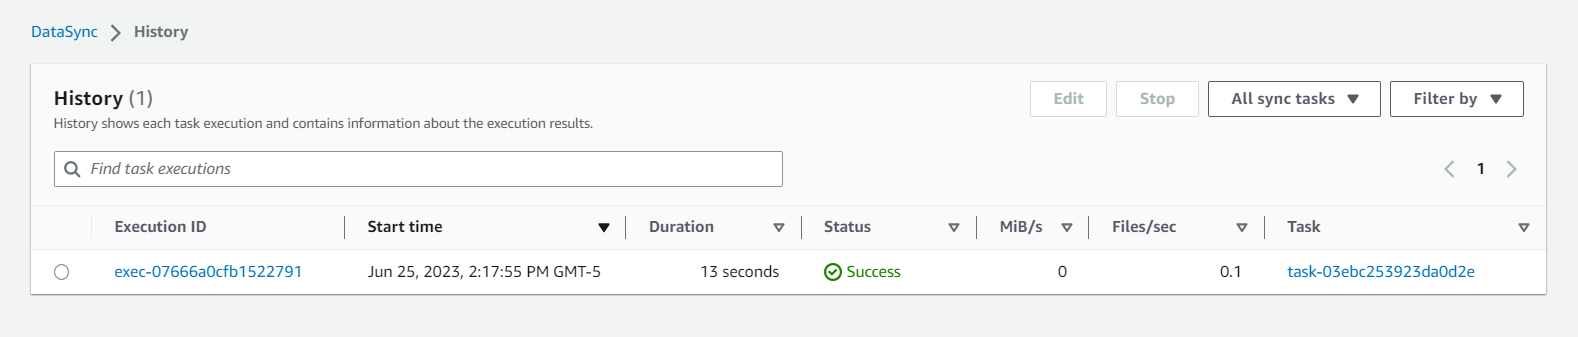
Navigate to the task and start it. You can view the task's execution progress in the Task History option:
By following the detailed steps outlined in this guide, you can successfully set up and execute tasks to transfer data between these cloud storage services, simplifying the migration process and reducing the time and effort required. Thanks, and happy coding.


