Amazon Cognito Authentication with Hosted UI for ASP.NET Core Apps

Somebody who likes to code
In our previous article, Authentication with Amazon Cognito and ASP.NET Core Identity, we discussed how to authenticate ASP.NET applications using the Amazon Cognito user pools API. This approach required us to maintain a significant amount of integration-related code. Luckily, there's another option: Hosted UI and federation endpoints. Amazon Cognito Hosted UI is a fully managed user interface for handling user authentication. It allows developers to easily add user sign-up, sign-in, and account management functionality to their applications without the need to build and maintain their authentication UI.
Our starting point will be the application built earlier, which we can find here. Let's start updating the template.yaml file as follows:
AWSTemplateFormatVersion: '2010-09-09'
Transform: AWS::Serverless-2016-10-31
Description: >
  SAM Template

Resources:
  UserPool:
    Type: AWS::Cognito::UserPool
    Properties:
      UsernameAttributes:
       - email
      UsernameConfiguration:
        CaseSensitive: false
      Policies:
        PasswordPolicy:
         MinimumLength: 8
         RequireLowercase: false
         RequireNumbers: false
         RequireSymbols: false
         RequireUppercase: false
         TemporaryPasswordValidityDays: 7
      MfaConfiguration: 'OFF'
      AccountRecoverySetting:
        RecoveryMechanisms:
          - Name: verified_email
            Priority: 1
      AdminCreateUserConfig:
        AllowAdminCreateUserOnly: false
      AutoVerifiedAttributes:
        - email
      UserPoolName: "myuserpool"
      UserAttributeUpdateSettings:
        AttributesRequireVerificationBeforeUpdate:
          - email
      Schema:
        - Name: email
          AttributeDataType: String
          Mutable: false
          Required: true
      EmailConfiguration:
        EmailSendingAccount: COGNITO_DEFAULT

  UserPoolClient:
    Type: "AWS::Cognito::UserPoolClient"
    Properties:
      ClientName: "myclient"
      GenerateSecret: true
      UserPoolId: !Ref UserPool
      ExplicitAuthFlows:
        - ALLOW_USER_SRP_AUTH
        - ALLOW_REFRESH_TOKEN_AUTH
      SupportedIdentityProviders:
        - COGNITO
      AllowedOAuthFlowsUserPoolClient: true
      AllowedOAuthFlows:
        - code
      AllowedOAuthScopes:
        - email
        - openid
        - profile
        - aws.cognito.signin.user.admin
      LogoutURLs:
        - "https://localhost:7119/Account/Loggedout"
      CallbackURLs:
        - "https://localhost:7119/signin-oidc"

  UserDomainPool:
    Type: AWS::Cognito::UserPoolDomain
    Properties:
      Domain: "myuserdomainpoolx95"
      UserPoolId: !Ref UserPool

Outputs:
  CognitoUserPoolID:
    Value: !Ref UserPool
    Description: The UserPool ID
  CognitoClientID:
    Value: !Ref UserPoolClient
    Description: The app client
  HostedUIDomain:
    Value: !Ref UserDomainPool
    Description: Hosted UI domain
From the original file, we modified the AWS::Cognito::UserPoolClient resource:
AllowedOAuthFlowsUserPoolClient: Enables OAuth features in our user pool app client.AllowedOAuthFlows: Specifies which OAuth grant types are allowed for the user pool client. An OAuth grant type defines how client applications interact with the server to obtain access tokens and authenticate users. The supported OAuth grant types are:code: This type involves the client getting an authorization code from the server once the user is authenticated. The client then trades this code for an ID token, an access token, and a refresh token. It's a good fit for web applications that can safely keep the client secret. Find more information here.implicit: In this type, the client gets an ID token and an access token directly from the server once the user is authenticated. This method is often used in single-page applications (SPAs) where it's not possible to securely keep the client secret. Find more information here.client_credentials: The client application trades its credentials (client ID and client secret) for an access token. This method is for machine-to-machine authentication where no user is involved. Find more information here.
AllowedOAuthScopes: Defines the OAuth scopes that the client is allowed to request. Each scope represents a specific permission or set of permissions the client can request:Values provided by OAuth are
phone,email,openid, andprofile.The value provided by AWS is
aws.cognito.signin.user.admin.Custom scopes created in Resource Servers are also supported.
CallbackURLs: A list of allowed redirect URIs. Each redirect URI must be an absolute URI using the HTTPS protocol, except for localhost.LogoutURLs: A list of allowed logout URLs.
A new resource, AWS::Cognito::UserPoolDomain, was created. It represents the domain associated with our user pool, hosting sign-up, and sign-in pages for our application. It's time to update our application. Run the following commands to update the resources:
sam build
sam deploy --guided
Let's update the application. Run the following command:
dotnet add MyWebApp package Microsoft.AspNetCore.Authentication.OpenIdConnect
Open the solution and update the Program.cs file as follows:
using Microsoft.AspNetCore.Authentication.Cookies;
using Microsoft.AspNetCore.Authentication.OpenIdConnect;
using Microsoft.IdentityModel.Protocols.OpenIdConnect;

var builder = WebApplication.CreateBuilder(args);

var configuration = builder.Configuration;

builder.Services.AddControllersWithViews();

builder.Services.AddAuthentication(options =>
{
    options.DefaultAuthenticateScheme = CookieAuthenticationDefaults.AuthenticationScheme;
    options.DefaultSignInScheme = CookieAuthenticationDefaults.AuthenticationScheme;
    options.DefaultChallengeScheme = OpenIdConnectDefaults.AuthenticationScheme;
})
.AddCookie()
.AddOpenIdConnect(options =>
{
    options.ResponseType = OpenIdConnectResponseType.Code;
    options.MetadataAddress = $"https://cognito-idp.{configuration["AWS:Region"]}.amazonaws.com/{configuration["AWS:UserPoolId"]}/.well-known/openid-configuration";
    options.ClientId = configuration["AWS:UserPoolClientId"];
    options.ClientSecret = configuration["AWS:UserPoolClientSecret"];
    options.UsePkce = true;
    options.Events = new OpenIdConnectEvents()
    {
        OnRedirectToIdentityProviderForSignOut = OnRedirectToIdentityProviderForSignOut
    };
    options.Scope.Clear();
    options.Scope.Add("openid");
    options.Scope.Add("email");
    options.Scope.Add("aws.cognito.signin.user.admin");
    options.Scope.Add("profile");
    options.SaveTokens = true;

    Task OnRedirectToIdentityProviderForSignOut(RedirectContext context)
    {
        context.ProtocolMessage.Scope = "openid";
        context.ProtocolMessage.ResponseType = OpenIdConnectResponseType.Code;
        var cognitoDomain = $"https://{configuration["AWS:Domain"]}.auth.{configuration["AWS:Region"]}.amazoncognito.com" ;
        var clientId = configuration["AWS:UserPoolClientId"]; ;
        var logoutUrl = $"{context.Request.Scheme}://{context.Request.Host}{configuration["AWS:AppSignOutUrl"]}";
        context.ProtocolMessage.IssuerAddress = $"{cognitoDomain}/logout?client_id={clientId}&logout_uri={logoutUrl}&redirect_uri={logoutUrl}";
        context.Properties.Items.Remove(CookieAuthenticationDefaults.AuthenticationScheme);
        context.Properties.Items.Remove(OpenIdConnectDefaults.AuthenticationScheme);
        return Task.CompletedTask;
    }
});

var app = builder.Build();

if (!app.Environment.IsDevelopment())
{
    app.UseExceptionHandler("/Home/Error");
    app.UseHsts();
}
app.UseHttpsRedirection();
app.UseStaticFiles();
app.UseRouting();
app.UseAuthentication();
app.UseAuthorization();
app.MapControllerRoute(
    name: "default",
    pattern: "{controller=Home}/{action=Index}/{id?}");

app.Run();
The AddOpenIdConnect method sets up the Open ID Connect authentication middleware:
MetadataAddress: OpenID Connect defines a discovery mechanism called OpenID Connect Discovery, where an OpenID server publishes its metadata at a well-known URL, typicallyhttps://{server}/.well-known/openid-configuration. This URL returns a JSON listing of the OpenID/OAuth endpoints, supported scopes and claims, public keys used to sign the tokens and other details. The clients can use this information to construct a request to the OpenID server. We can use this property instead of theAuthorityproperty.ClientId: The client ID assigned to your application by the OpenID Connect provider.ResponseType: Specifies the type of response expected from the server. Values includecodefor authorization code grant flow andid_token tokenfor implicit grant flow.ClientSecret: The client secret assigned to your application by the OpenID Connect provider. This is used for securely exchanging tokens and authenticating requests.Scopes: Specifies the scopes requested by your application during the authentication process. Scopes includeopenid,profile,email, etc.Events: Allows you to handle various events during the authentication. For example, theOnRedirectToIdentityProviderForSignOutis triggered when the application needs to redirect the user to the identity provider for sign-out. We can use this event to customize the redirect URL or to add additional parameters to the sign-out request.SaveTokens: When set totrue, this property instructs the OpenID Connect middleware to save the tokens received from the identity provider (such as access token, ID token, and refresh token) in the authentication properties associated with the user's claims principal.UsePkce:Proof Key for Code Exchange is a security extension to the Authorization Code flow to prevent certain types of attacks. When set totrue, this property instructs the OpenID Connect middleware to use PKCE during the Authorization Code flow.
Open the appsettings.json file to update its content as follows:
{
  "Logging": {
    "LogLevel": {
      "Default": "Information",
      "Microsoft.AspNetCore": "Warning"
    }
  },
  "AllowedHosts": "*",
  "AWS": {
    "Region": "<MY_REGION>",
    "UserPoolClientId": "<MY_CLIENT_ID>",
    "UserPoolClientSecret": "<MY_CLIENT_SECRET>",
    "UserPoolId": "<MY_USER_POOL_ID>",
    "Domain": "myuserdomainpoolx95",
    "AppSignOutUrl": "/Account/Loggedout"
  }
}
Open the Controllers/AccountController.cs file and update the content with:
public class AccountController : Controller
{
    public AccountController()
    {
    }

    [HttpGet]

    public IActionResult Logout()
    {
        return SignOut(CookieAuthenticationDefaults.AuthenticationScheme, OpenIdConnectDefaults.AuthenticationScheme);
    }

    [HttpGet]
    public IActionResult Loggedout()
    {
        return View();
    }

    [HttpGet]
    public IActionResult Login(string returnUrl="/")
    {
        var props = new AuthenticationProperties()
        {
            RedirectUri = returnUrl,
        };
        return Challenge(props, OpenIdConnectDefaults.AuthenticationScheme);
    }
}
The
Loginmethod initiates the authentication process by returning theChallengemethod. After Amazon Cognito redirects tohttps://localhost:7119/signin-oidc, the application will be redirected to the URL specified in theRedirectUriproperty.The
Logoutmethod is used to trigger the logout of the current user by invalidating their authentication session.The
Loggedoutmethod is the endpoint where Amazon Cognito redirects after a logout (https://localhost:7119/Account/Loggedout). A default endpointhttps://localhost:7119/signout-callback-oidccan be used, but it will show an empty page after the redirect.
Add a new Views/Account/Loggedout.cshtml file as follows:
@{
    ViewData["Title"] = "Logged out";
}

<h2>@ViewData["Title"]</h2>
<p>
    You have successfully logged out.
</p>
Update the Views/Shared/_Layout.cshtml file with the content below:
@using Microsoft.AspNetCore.Identity
@using Amazon.Extensions.CognitoAuthentication
@using System.Security.Claims
<!DOCTYPE html>
<html lang="en">
<head>
<meta charset="utf-8" />
<meta name="viewport" content="width=device-width, initial-scale=1.0" />
<title>@ViewData["Title"] - MyWebApp</title>
<link rel="stylesheet" href="~/lib/bootstrap/dist/css/bootstrap.min.css" />
<link rel="stylesheet" href="~/css/site.css" asp-append-version="true" />
<link rel="stylesheet" href="~/MyWebApp.styles.css" asp-append-version="true" />
</head>
<body>
<header>
<nav class="navbar navbar-expand-sm navbar-toggleable-sm navbar-light bg-white border-bottom box-shadow mb-3">
<div class="container-fluid">
<a class="navbar-brand" asp-area="" asp-controller="Home" asp-action="Index">MyWebApp</a>
<button class="navbar-toggler" type="button" data-bs-toggle="collapse" data-bs-target=".navbar-collapse" aria-controls="navbarSupportedContent"
aria-expanded="false" aria-label="Toggle navigation">
<span class="navbar-toggler-icon"></span>
</button>
<div class="navbar-collapse collapse d-sm-inline-flex justify-content-between">
<ul class="navbar-nav flex-grow-1">
<li class="nav-item">
<a class="nav-link text-dark" asp-area="" asp-controller="Home" asp-action="Index">Home</a>
</li>
<li class="nav-item">
<a class="nav-link text-dark" asp-area="" asp-controller="Home" asp-action="Privacy">Privacy</a>
</li>
</ul>
<ul class="navbar-nav">
@if (User.Identity.IsAuthenticated)
{
<li class="nav-item">
<span class="nav-link text-dark">Hello @User.FindFirstValue(ClaimTypes.Email)!</span>
</li>
<li class="nav-item">
<a class="nav-link text-dark" asp-area="" asp-controller="Account" asp-action="Logout">Logout</a>
</li>
}
else
{
<li class="nav-item">
<a class="nav-link text-dark" id="login" asp-area="" asp-controller="Account" asp-action="Login" asp-route-returnUrl="@Url.Action("Index", "Home", new { area = "" })">Login</a>
</li>
}
</ul>
</div>
</div>
</nav>
</header>
<div class="container">
<main role="main" class="pb-3">
@RenderBody()
</main>
</div>
<footer class="border-top footer text-muted">
<div class="container">
© 2024 - MyWebApp - <a asp-area="" asp-controller="Home" asp-action="Privacy">Privacy</a>
</div>
</footer>
<script src="~/lib/jquery/dist/jquery.min.js"></script>
<script src="~/lib/bootstrap/dist/js/bootstrap.bundle.min.js"></script>
<script src="~/js/site.js" asp-append-version="true"></script>
@await RenderSectionAsync("Scripts", required: false)
</body>
</html>
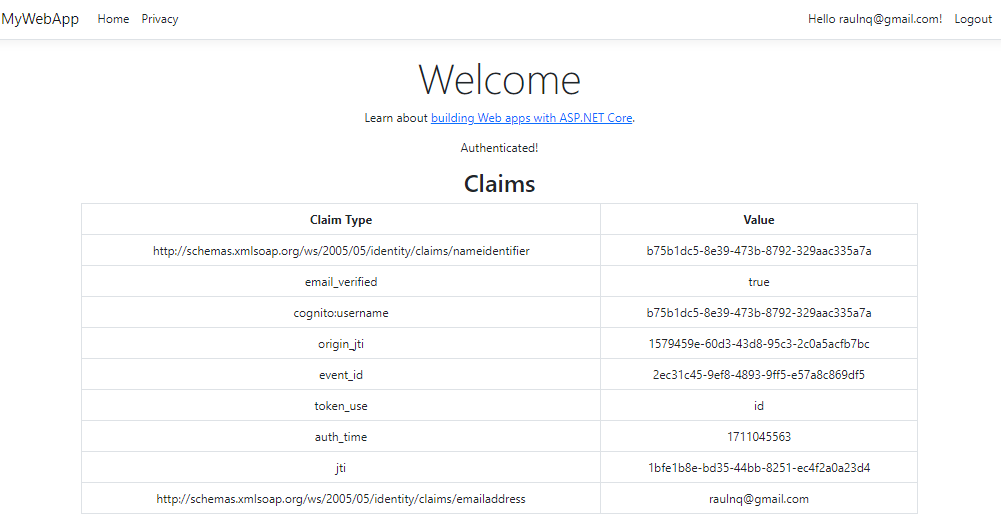
Update the Views/Home/Index.cshtml file with the content below:
@using Microsoft.AspNetCore.Authentication
@{
    ViewData["Title"] = "Home Page";
}

<div class="text-center">
    <h1 class="display-4">Welcome</h1>
    <p>Learn about <a href="https://learn.microsoft.com/aspnet/core">building Web apps with ASP.NET Core</a>.</p>

    @if (User.Identity.IsAuthenticated)
    {
        <p>
            Authenticated!
        </p>
        <h2>Claims</h2>
        <table class="table table-bordered">
            <tr>
                <th>Claim Type</th>
                <th>Value</th>
            </tr>
            @foreach (var item in User.Claims)
            {
                <tr>
                    <td>
                        @item.Type
                    </td>
                    <td>
                        @item.Value
                    </td>
                </tr>
            }
        </table>
    }
</div>
Finally, delete the Models/ConfirmViewModel.cs, Models/LoginViewModel.cs, Models/RegisterViewModel.cs, Views/Account/Confirm.cshtml, Views/Account/Login.cshtml, and Views/Account/Register.cshtml files. Then, run the application:

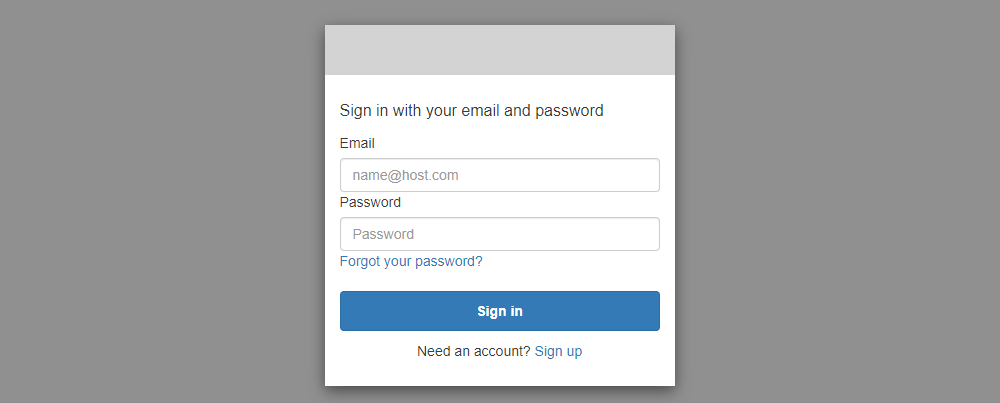
Click the login button, and the browser will redirect us to the Amazon Cognito login page:
After logging in, Amazon Cognito will redirect us back to the application:
Amazon Cognito Hosted UI makes adding user authentication simpler, providing a secure, customizable, and scalable solution. It cuts down on development time and effort, improving the overall user experience of our applications. All the code can be found here. Thanks, and happy coding.


