How to Attach Large Files to a Pod using Helm and Kubernetes
Somebody who likes to code
A method for mounting files into a pod involves adding ConfigMap data to a volume, as shown below:
apiVersion: v1
kind: ConfigMap
metadata:
  name: myconfigmap
data:
  myfile.txt: |
    this is the content of the file
---
apiVersion: apps/v1
kind: Deployment
metadata:
  name: mydeployment
spec:
  replicas: 1
  selector:
    matchLabels:
      app: myapp
  template:
    metadata:
      labels:
        app: myapp
    spec:
      volumes:
      - name: myvolume
        configMap:
          name: myconfigmap
      containers:
        - name: mycontainer
          image: myimage
          volumeMounts:
          - name: myvolume
            mountPath: /mypath/myfile.txt
            subPath: myfile.txt
However, what if the file is large or challenging to maintain within the configMap definition? Wouldn't it be great if we could embed the content of a file into the configMap definition? Fortunately, this is possible if we use Helm as a package manager for Kubernetes. Let's take the deployment of our own Technology Radar in our Kubernetes cluster as an example.
Pre-requisites
Install Docker Desktop
Enable Kubernetes (the standalone version included in Docker Desktop)
Install the Helm CLI.
Helm Chart
Run the following command to create a Helm chart:
helm create tech-radar
Create a config.csv file with the following content. Navigate to the tech-radar folder; open the values.yaml file, and modify it as follows:
replicaCount: 1
image:
  repository: wwwthoughtworks/build-your-own-radar
  pullPolicy: IfNotPresent
  tag: "latest"
nameOverride: ""
fullnameOverride: ""
Navigate to the templates folder and create a configmap.yaml file containing the following content:
apiVersion: v1
kind: ConfigMap
metadata:
  name: {{ include "tech-radar.fullname" . }}
  labels:
    {{- include "tech-radar.labels" . | nindent 4 }}
data:
  config.csv: |
{{ .Values.configCsv | indent 4 }}
Modify the deployment.yaml as follows:
apiVersion: apps/v1
kind: Deployment
metadata:
  name: {{ include "tech-radar.fullname" . }}
  labels:
    {{- include "tech-radar.labels" . | nindent 4 }}
spec:
  replicas: {{ .Values.replicaCount }}
  selector:
    matchLabels:
      {{- include "tech-radar.selectorLabels" . | nindent 6 }}
  template:
    metadata:
      labels:
        {{- include "tech-radar.selectorLabels" . | nindent 8 }}
    spec:
      volumes:
      - name: config-volume
        configMap:
          name: {{ include "tech-radar.fullname" . }}
      containers:
        - name: {{ .Chart.Name }}
          image: "{{ .Values.image.repository }}:{{ .Values.image.tag | default .Chart.AppVersion }}"
          imagePullPolicy: {{ .Values.image.pullPolicy }}
          volumeMounts:
          - name: config-volume
            mountPath: /opt/build-your-own-radar/files/config.csv
            subPath: config.csv
          env:
            - name: SERVER_NAMES
              value: localhost 127.0.0.1
          ports:
            - name: http
              containerPort: 80
              protocol: TCP
          resources:
           limits:
             cpu: 2000m
             memory: 1024Mi
           requests:
             cpu: 2000m
             memory: 1024Mi
Remove the remaining yaml files.
Release
Run the following command to install our chart:
helm upgrade tech-radar-release tech-radar --install --set-file configCsv="./config.csv"
We can use --set-file to set the content of a file as a value for our chart. Run kubectl describe configMap tech-radar-release to see our configMap definition.
The Application
Let's use port forwarding to test our application with the following command:
kubectl port-forward deployment/tech-radar-release 8080:80
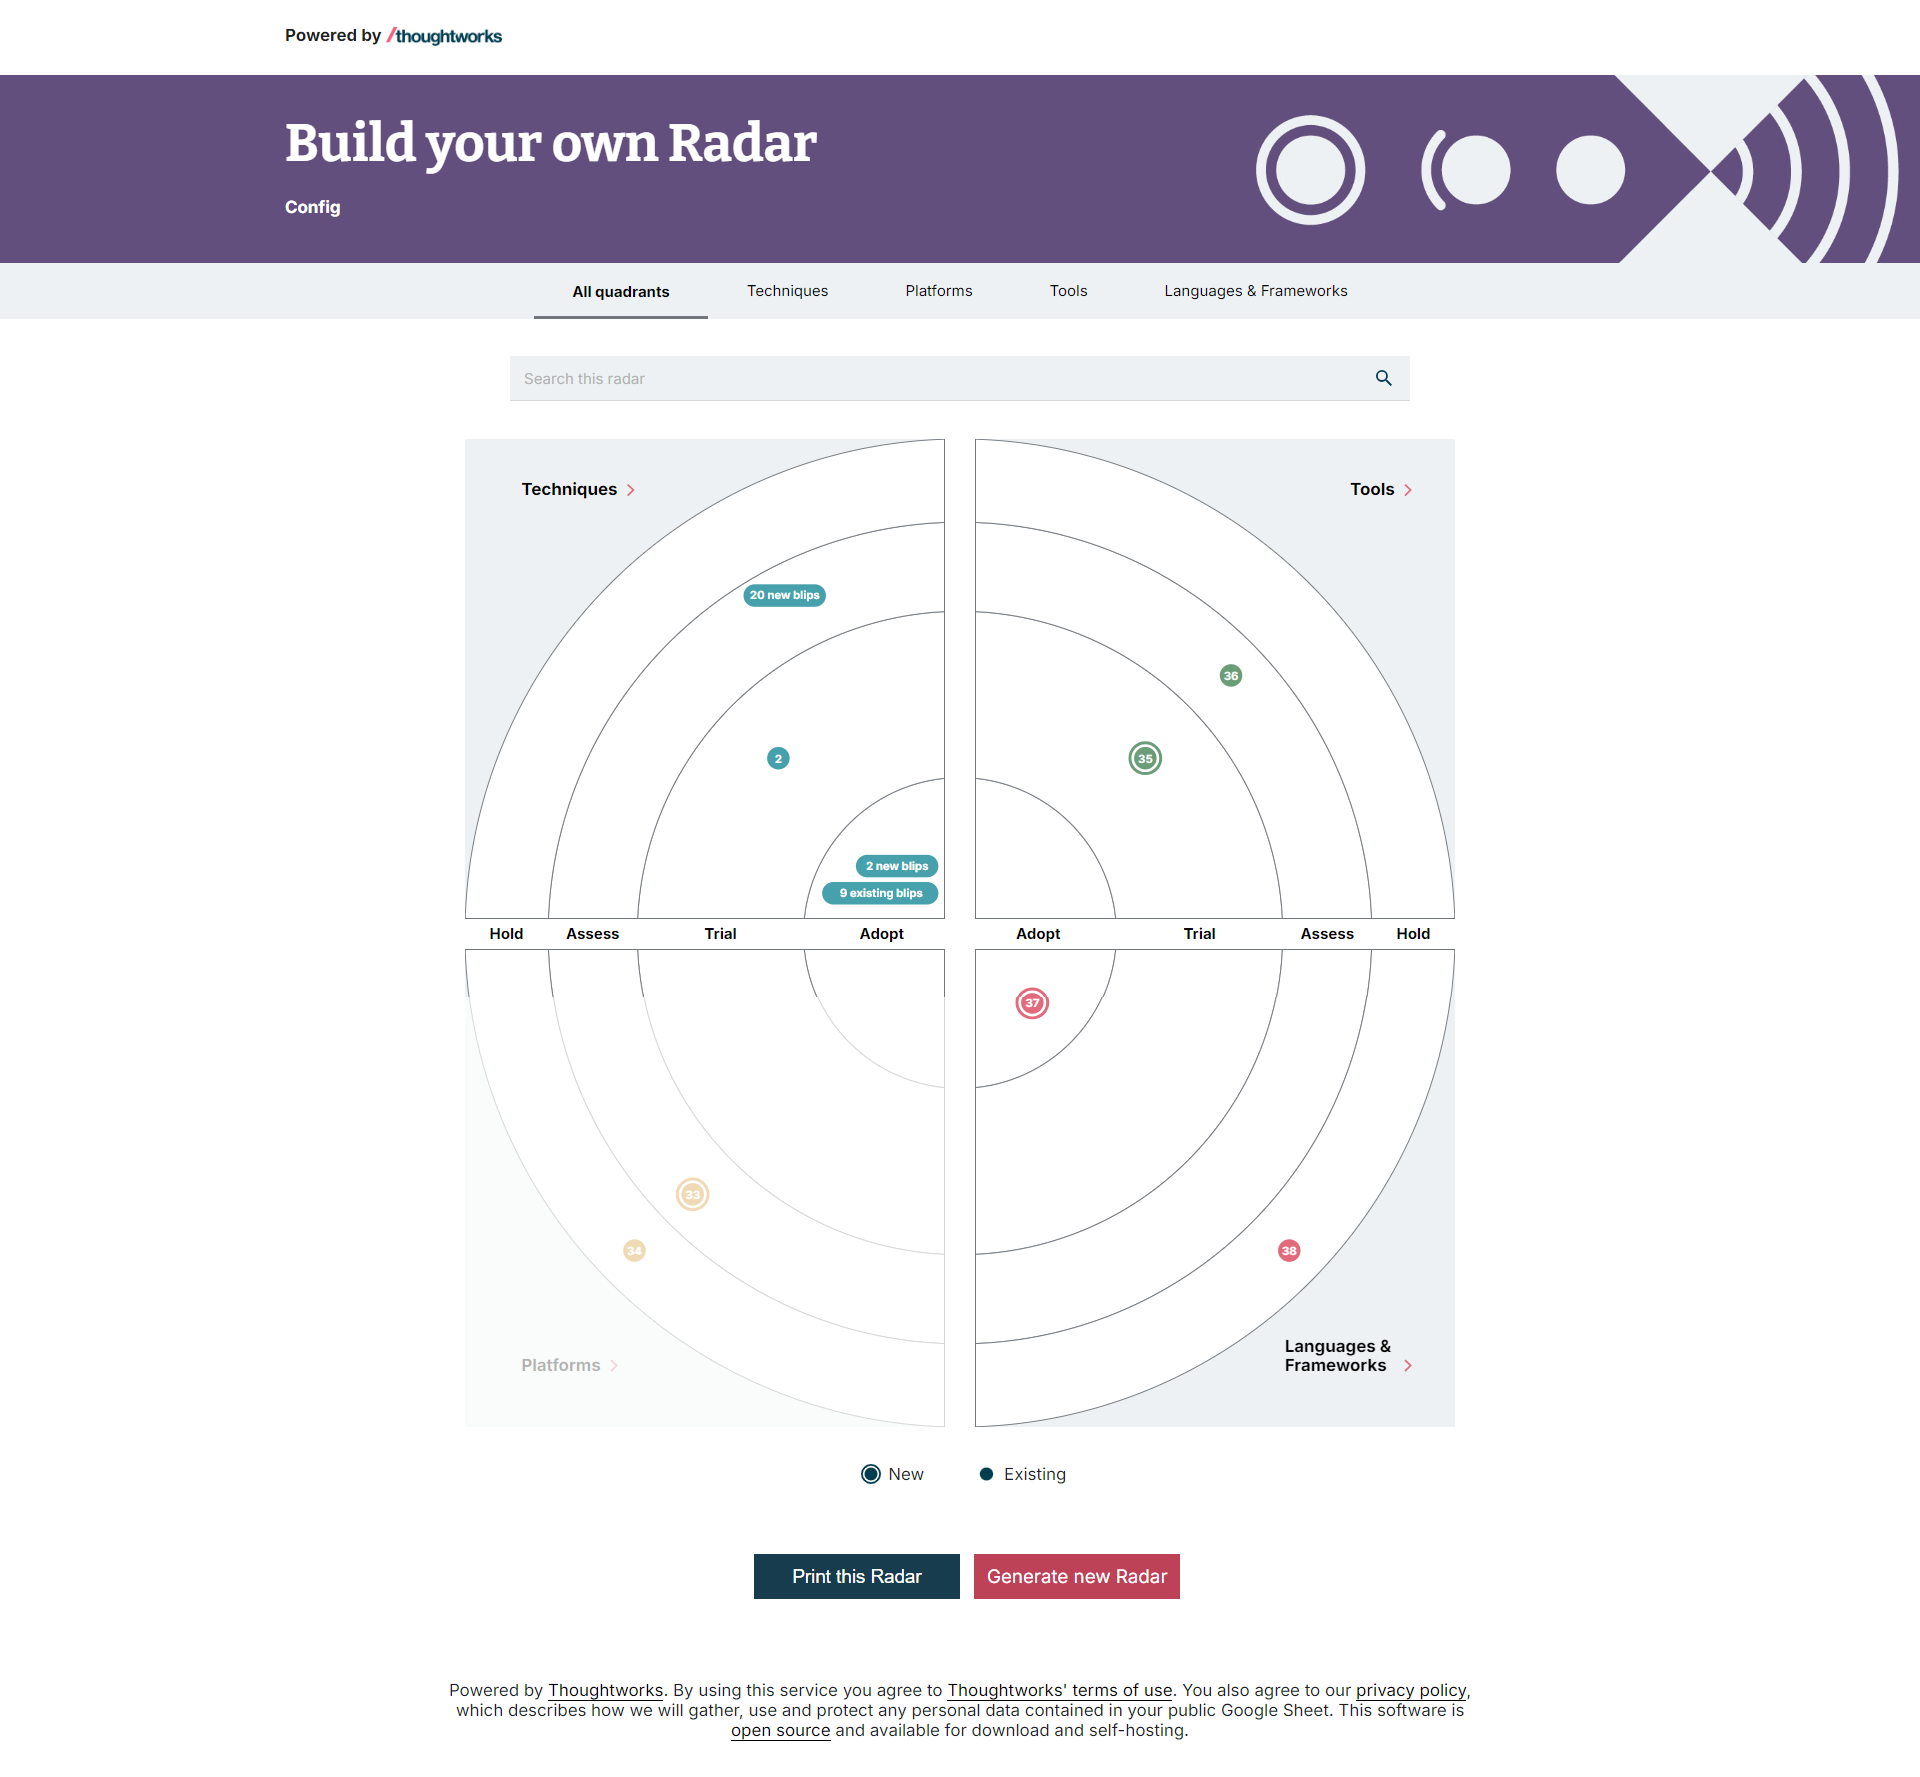
Navigate to http://localhost:8080/ to see the application up and running. In another tab, navigate to the address http://localhost:8080/files/config.csv, use the file in the application, and enjoy your own Technology Radar:
The final scripts can be found here. Thank you, and happy coding.


